All posts by dtAdmin

Phone Number Matching in CRM

Dynamics Telephony uses an advanced algorithm to match incoming phone numbers with phone numbers in your CRM. Dynamics Telephony will successfully math in the vast majority of situations. It can handle number formats in your CRM such as

(613) 555 1212
+44 1628 555 1212
45 56 67 78

Sometimes you will find that the callers number is not found in your CRM due to pattern matching problems. For example, you might find that the callers number is coming in with a “Tel:” or “Sip:” prefix and the phone numbers in your CRM do not have this prefix. In these cases, use the RegEx pattern match setting to fix the incoming number as follows:

Settings > Inbound Configuration : Regex Phone Number:

  • For Lync or Skype you must use: tel:\+(\d+)
  • For SIP you must use: sip:(\d+);.*
  • For all other CTI Providers use: sip:(\d+);.*


Log file retrieval

The Dynamics Telephony log file is required if you have to report an issue. There are two ways to locate it.

Method 1

There is a link in the application to retrieve it. Use “Save As..” to save it to a convenient location and then attach it to the email to us.

retrieveLogFile

Method 2

The log file is named: DynamicsTelephony.NN.log  Where NN is the day of the month.

The file can be retrieved at the following location. If you do not have permission to access this location then you need to speak with your IT Administrator.

C:\Users\user_name\AppData\Roaming\
CT Solutions\DynamicsTelephony

Users on SIP (Asterisk, FreePBX etc.) may also be asked to retrieve the SIP log.  Go to the App Folder on the DT Menu and retrieve pjsip.log

Consult, transfer and conference

Blind Transfer

This is where you want to transfer a phone call to a co-worker blindly – without speaking with your co-worker first.

  1. Blind Transfer must be enabled in Menu > Settings > General > Allow Blind Xfer
  2. When connected on a phone call, Hover over the Phone Book button and make sure Blind Transfer checkbox is ticked
  3. Click on a Phone Book contact -or-
    enter a phone bumber in the dial box and press ENTER
  4. The call is blind transferred and your line is idle
Consult Transfer

This is where you wish to speak with you co-worker before transferring the customer to him.

  1. With a call in progress, make a call on another Call Tab. The first call is automatically out on hold.
  2. When the second party answers, consult with them as required.
  3. Drag the second call (the active call) onto the firs call to complete the transfer
Conference Call
  1. With a call in progress, make a call on another Call Tab. The first call is automatically put on hold.
  2. When the second part answers, hold down CTRL and drag the second call tab on to the first call tab. You are now in conference.
Conference Transfer

Same as Conference Call except you can drop out of the conference and leave the other two parties talking, by clicking the red Release button.

Handling Contact Center Outbound Calls

When Dynamics Telephony is used with DTI and a Contact Center, you can handle the Contact Center Outbound calls. You can accept or reject an outbound call, and you will get a screen pop in CRM of the associated lead/contact/phonecall.

First, use the agent status control (top right) to login and make yourself READY.

agent_status_loginout_notready

Then, when an outbound call is presented for you to do, you will see a prompt on a Call Tab like this

To get more information before you “Accept” the outbound call, you can click on the customer reference (account, contact or lead), or the “Regarding”.

Click Accept or Reject. If you reject the call, notice that you are automatically put in NOT READY.

If you click Accept, the preview timer countdown (top right) may start. After the countdown completes, the phone call is automatically placed to the customer.

See toolbar controls for handling the active phone call

Manage Callbacks

Dynamics Telephony allows you to set a callback promise for a customer. Select the Outcome “callback” in the Dynamics Telephony toolbar.

callback_button

In the popup, select the date and time for the callback using keyboard entry, up-down arrow or the popout calendar.

callback_set_date_time

The callback promise will be entered as the “Due” time and date for the phonecall activity in CRM. In addition, if you have Dynamics Telephony Integration (DTI) with your contact center, the callback will be automatically presented to an agent at the appropriate time and date.

If you have Outlook integration for CRM, the callback may be managed there too.

DT Server Entities for integration

The following entities can be used for reports or triggered on for server-side integration.

cts_dialerCall – one entry for each phone call processed by DT. The same entry is used for the lifetime of the phone call. Can be linked to the associated CRM phone call. Fields include: agent (CRM user), calls, no answers, busies, connects, didConnect, direction, phone number, phone call ID, status (open, retry, closed), subject (e.g. campaign name), to (full name), computedOutcome (for your use – to change the outcome), aborts (selected an outcome that did not connect and isConnectXorAbort true on the selected outcome)

cts_dialerCallEvent – one entry for each event including: talk, ring, idle, error on dial, busy, no answer,  with fields: direction, duration, event name, phone number and dialer call ID in cts_dialerCall.

cts_dialerCallResult – one entry every time a call gets an outcome with fields including: agent (CRM user), dialer call ID in cts_dialerCall, direction, phone number, result (outcome as chosen by agent or automatically), and subject (e.g. campaign name)


DT Client API Overview

Dynamics Telephony Client includes an API that can be used for such use cases as:

  • Trigger a CRM workflow based on outcome/disposition chosen for an outbound call
  • Display a particular Form in CRM based on the queue the customer called in on
  • Auto-populate a field in the From with the queue name
  • Change the CRM form based on the outcome/disposition chosen for an outbound call
  • Auto-promote a lead to an opportunity based on the outcome/disposition chosen for an outbound call
  • Control the wrap time / end of wrap from Javascript in the CRM form
  • Allow a CRM form to set the Outcome in Dynamics Telephony.

For a quick get-started with a simple API walk-through, see here

The following can be used by javascript running in any DT call tab. Any data refers to the call currently (or most recently) active in that call tab. All method calls are pre-pended with “DynamicsTelephony.”  For example to register for DT events:

// Create a Callback Function to be triggered 
// on call events
var fn = function (evtData) {
var oCall = DynamicsTelephony.parseEventArgs(evtData)
/*  
   TODO: implement your code here
*/
};

// Register for events...
DynamicsTelephony.RegisterForEvents(fn);

Or to get the details of the current call:

var oCall = DynamicsTelephony.GetCallDetails();
Dynamics Telephony Methods
DynamicsTelephony.RegisterForEvents(fnEventHandler)

Registers to receive telephony callbacks from DT in the function “fnEventHandler”. “fnEventHandler” should have the format:

var fn = function (evtData) {};

Where the evtData is the event payload passed from DT which can be objectified using the method “parseEventArgs()” below.

DynamicsTelephony.parseEventArgs(e)

Convert an events payload (evtData in the above EG)  into a javascript object with the following properties:

  • state – The current state of the call
  • stateTime – The Datetime this state occurred
  • type – always “phonecall” at present
  • id – the guid of the CRM phonecall for this call
  • direction – one of  inbound, outbound, clicktocall, transfer or ccOutbound
  • phone – The phone number associated with the current call
  • outcome – No Answer, Voice Mail, etc. Any configured outcome
  • fromType – agent, lead, contact, account, case etc…
  • fromId – ID for above
  • toType – agent, lead, contact, account, case etc…
  • toId – ID for above
  • dtCallId – ID to link to dialerCalls table to get attempts, for example
  • isCallback – true or false, indicating where the call is a callback.
  • retryDatetime – The retry date/time of the call (Format “YYYY-MM-DDTHH:MM:SSZ”)
  • dnis – ^The number the customer originally dialed
  • queueDn – ^The phone number of the queue in the Contact Center
  • agentId – ^The agent ID in the Contact Center
  • extension – ^When available, the agents phone number that the call is on.

^When Available

DynamicsTelephony.GetCallDetails()
Returns data on the current call,  in an object the same as described in parseEventArgs() above.
DynamicsTelephony.dial(number)

Dials the “number” passed on the current call tab.

DynamicsTelephony.holdresume()

Holds / Resumes the call on the current call tab.

DynamicsTelephony.transferBlind(number)

Blind transfers the call on the current call tab to the “number” provided.

DynamicsTelephony.transferConsult(number)

Consult transfers the call on the current call tab to the “number” provided.

DynamicsTelephony.transferComplete(callTab)

Completes the transfer of the call on the current call tab to the call on the call tab provided. The current call tab must have a call in the active (not held) state and the call on the provided call tab must be on hold for successful transfer.

DynamicsTelephony.conference(callTab)

Conferences the call on the call tab provided to the call  on the current call tab. The current call tab must have a call in the active (not held) state and the call on the provided call tab must be on hold for successful conference.

DynamicsTelephony.answer()

Answer the call on the current call tab.

DynamicsTelephony.release()

Release / Hang-up  the call on the current call tab.

DynamicsTelephony.agentReady()

Put the agent in ready state.

DynamicsTelephony.agentNotReady()

Put the agent in not ready state.

DynamicsTelephony.playWaveFile(filename)

Plays the file “filename” into the call on the current call tab.

DynamicsTelephony.sendDTMF(digit)

Sends the DTMF tone(s) in “digit” into the call on the current call tab. “digit” can be one or more of the following: 0123456789*#

DynamicsTelephony.logThis(text)

Sends the text to the Dynamics Telephony log file. Useful for debugging. Please remove when in production.

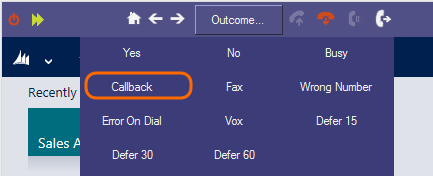
DynamicsTelephony.setOutcome(outcome_name)

Sets the outcome in Dynamics Telephony as if the agent had clicked on it in the outcome list in Dynamics Telephony. The outcome_name is the same as the defined outcome name – case-sensitive.

DynamicsTelephony.setCallEnd()

Fast-forwards Dynamics Telephony to the end of the call. This is the same as if the agent clicks FFWD during Wrap time. If the windows are set to auto-close, then the window will close.

Telephony Events

The event handler is triggered for each of the following telephony state changes:

  • preview – DT or CC Dialer call presented to agent and preview timer started
  • incoming – Inbound call or CC Dialer call presenting to agent
  • ringing – An outbound call is dialed and waiting for the customer to answer
  • talk – the call is active
  • idle – The call has been released, wrap timer may be running
  • end – The wrap time has expired or agent has manually moved on to the next call

The event payload contains the same data as returned from DynamicsTelephony.GetCallDetails() and this can be parsed to a javascript object using:

var oCall = DynamicsTelephony.parseEventArgs(evtData);


See here for code samples.

Edit Phone Book

In Dynamics Telephony you can save all your frequently used contacts in your Phone Book. Then you can one-click call, or transfer to, these contacts. Also, the contacts in the Phone Book can be monitored for Presence – see here for more details.

NOTE: You can configure the number of columns your Phone Book displays using Menu > Settings > General Settings > Phonebook Columns

Sharing the one Phone Book

If you want, you can easily use the same Phone Book for all users. This way, when you edit the Phone Book (see below), all users automatically get the updated Phone Book.

You could set up one Phone Book for all users, or one for each group.

  1. On each agents PC, edit (using Notepad) the following file (in the App Directory):
    C:\Users\user_name\AppData\Local\Apps\2.0\24K624J6.1JJ\C96BM7WW.MRL\dyna..tion_8855e60ab9a52988_0002.0000_9c0f5092a33ef22f\DynamicsTelephony.exe.config
  2. Locate the setting PhoneBookFile and set it to the file you want to use. For example,
    <setting name=”PhoneBookFile” serializeAs=”String”>
        <value>Z:\Groupfiles\PhoneBook.xml</value>
    </setting>
  3. Restart the Dynamics Telephony client.
    NOTE: If you use Dynamics Telephony client to open the Phone Book and edit it, it will edit this shared file. So you might want to restrict access to this file using the Dynamics Telephony > Settings > Admin Only Access
    IMPORTANT: You MUST keep a backup of the DynamicsTelephony.exe.config file as this file can be overwritten when Dynamics Telephony is updated. You can use the same file for all users

Editing the Phone Book

  1. The Phone Book is contained in a text file on each users PC (or at a shared location). To open yours, go to Menu > Phone Book
  2. These are the XML node descriptions:
    1. <TeamMember>…</TeamMember> This delineates a single contact in your Phone Book
    2. <id>12</id> This is not required. If it is in your phonebook you should remove it must be unique for each contact, if you have it.
    3. <name>John Russell</name> This is the text displayed for the contact.
    4. <uri>sip:my_friend@yourcompany.com</uri>   -or-
      <uri>6135551212</uri>   This is the phone number or SIP address of the contact. Use SIP address if you want presence information.
    5. <presence>false</presence>  This is not required and you can remove it. Specifies if Dynamics Telephony should try and get Presence information for this contact. Set to False unless you know you can get Presence for this contact.

Sample ( without presence )

<?xml version="1.0" encoding="utf-8"?>
<PhoneBook xmlns:xsi="http://www.w3.org/2001/XMLSchema-instance" xmlns:xsd="http://www.w3.org/2001/XMLSchema">
 <Contacts>
<TeamMember>
<uri>2000</uri>
<name>Reception</name>
</TeamMember>
<TeamMember>
<uri>2002</uri>
<name>Gregorie</name>
</TeamMember>
<TeamMember>
<uri>2003</uri>
<name>Anne</name>
</TeamMember>
 </Contacts>
</PhoneBook>


Presence

You can monitor the presence (or status) of the people entered in your Phone Book (assuming they “publish their presence”). Presence is published by SIP users, and some other systems too.

phone_book_presence

Setting it up

  1. In Dynamics Telephony settings, under Provider Configuration, tick the checkbox next to Publish Enabled.
  2. In Dynamics Telephony menu, select Phone Book. Edit the users you want to monitor similar to as shown below and save. In particular see the items in bold.
     <TeamMember>
     <id>10</id>
     <name>Polly Curtin</name>
     <uri>sip:ponct1@iptel.org</uri>
     <presence>true</presence>
     </TeamMember>

    See here for important details on editing the Phone Book.

  3. Restart Dynamics Telephony client. Hover over the Phone Book icon as shown in the screen snap above.

NOTE: You can also set your own status using the button on the extreme left of the Dynamics Telephony toolbar.