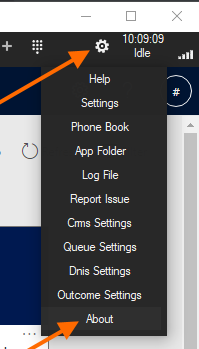
To clear the DT Client browser cache
- DT Menu > About
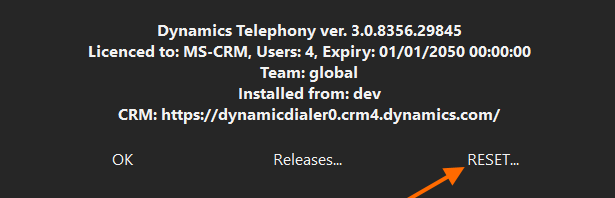
- In the about dialog, click RESET…
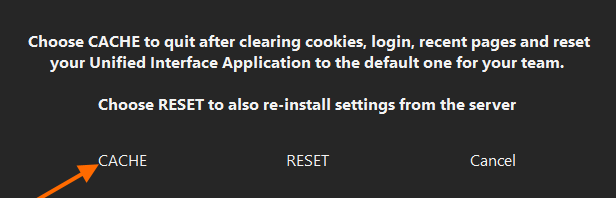
- In the next dialog, click CACHE
Day to day guide for users of Dynamics Telephony
To clear the DT Client browser cache
This is the guide you need to keep a link to for a quick reminder of all features
This is a standalone feature that does not require the Dynamics Telephony Client.
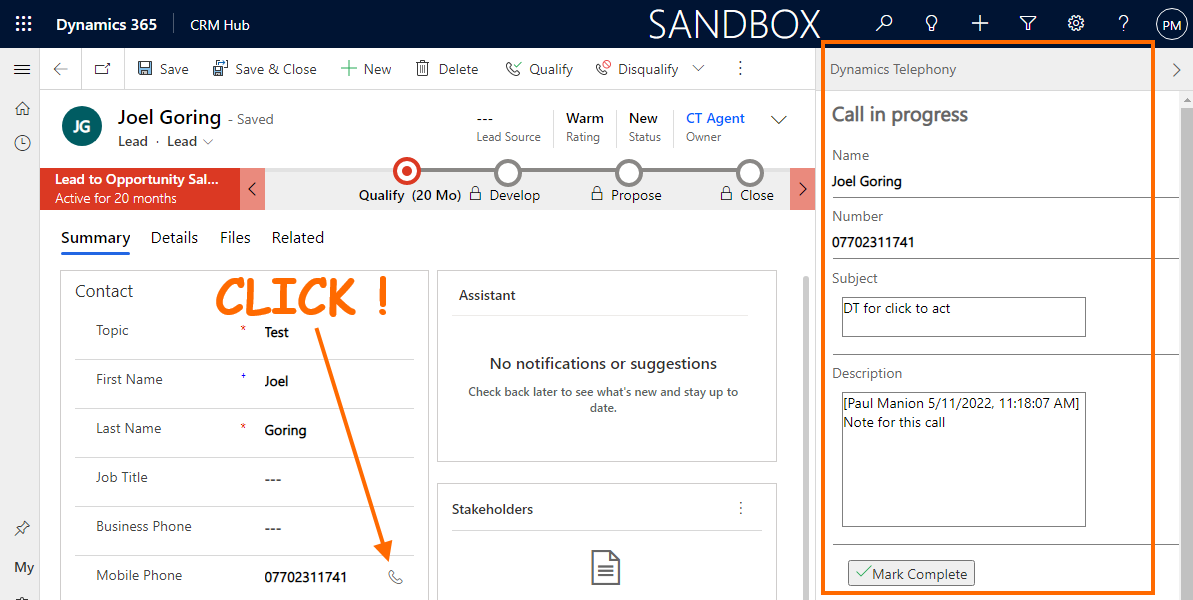
This feature allows you to click on any phone number in a Dynamics 365 CRM entity, and the call is automatically dialed for you and ALSO logged in CRM for you automatically.
The system first rings your own phone (mobile, landline, smartphone app, anything). When you answer that, the system will bridge in the number you clicked on. So, no special integration or settings are required to get going. Simply provide your own phone number and you are ready to go.
Dynamics Telephony checks for a new queue-item after every call and then every 30 seconds. Here are reasons why this will not happen.
Your user status should be green. In some cases orange is OK too. But you should definitely not be red. (the text will vary depending on your phone system, but the color is the key)

NOTE: Your phone system may put you in “Red” after a call. Disable this if you can.

You are put into “Pause” state if you have not selected an outcome by the end of “Wrap” time.
To get out of “Pause”, click the “Play” button. You may have to select and outcome and also wait until the end of Wrap time (or “Skip” the Wrap time.

If you see flashing, or red or orange on a call tab, then check that tab to see it is IDLE

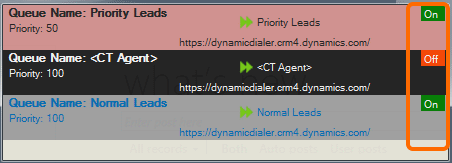
If you turn your queue ON/OFF, then be sure it is ON. Click where it says ON/OFF to change. If this is a shared queue, then other users will take about a minute to change too.
Dynamics Telephony contains a very convenient Phonebook panel, complete with Call History.
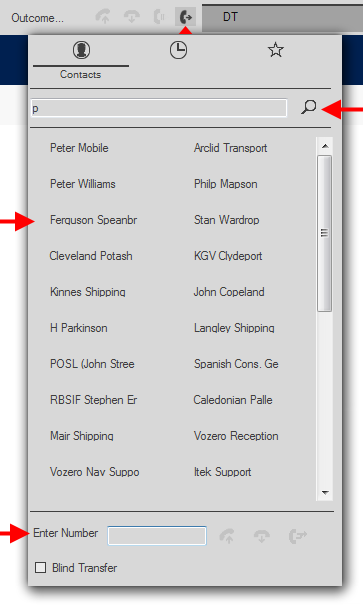
All your internal and external contacts can be listed here. Simply start typing the name in the Search Box and the list is instantly filtered to match.
Click on a contact to call them. If you have a call in progress already, clicking on a contact will Transfer the call to them. Quick and easy.
Or enter a number in the Dial Box for contacts not in your phonebook.
See here for how to set up your phonebook, for individual users or teams.
The Phonebook panel also contains your Call History for the last 7 days (or to the limit of records set by your system administrator).
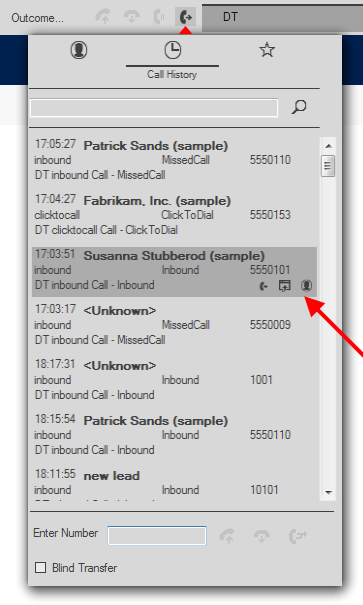
Here you can see you recent Missed Calls, as well as your recent inbound and outbound calls.
Move your mouse over an item to reveal three buttons:
– Dial the contact
– Navigate to the entity in CRM
– Navigate to the phonecall activity in CRM
This is where you want to transfer a phone call to a co-worker blindly – without speaking with your co-worker first.
This is where you wish to speak with you co-worker before transferring the customer to him.
Same as Conference Call except you can drop out of the conference and leave the other two parties talking, by clicking the red Release button.
When Dynamics Telephony is used with DTI and a Contact Center, you can handle the Contact Center Outbound calls. You can accept or reject an outbound call, and you will get a screen pop in CRM of the associated lead/contact/phonecall.
First, use the agent status control (top right) to login and make yourself READY.
Then, when an outbound call is presented for you to do, you will see a prompt on a Call Tab like this
To get more information before you “Accept” the outbound call, you can click on the customer reference (account, contact or lead), or the “Regarding”.
Click Accept or Reject. If you reject the call, notice that you are automatically put in NOT READY.
If you click Accept, the preview timer countdown (top right) may start. After the countdown completes, the phone call is automatically placed to the customer.
See toolbar controls for handling the active phone call
Dynamics Telephony allows you to set a callback promise for a customer. Select the Outcome “callback” in the Dynamics Telephony toolbar.
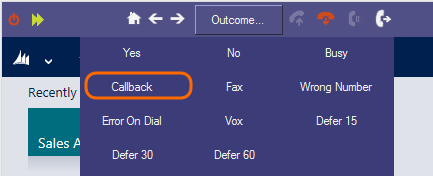
In the popup, select the date and time for the callback using keyboard entry, up-down arrow or the popout calendar.

The callback promise will be entered as the “Due” time and date for the phonecall activity in CRM. In addition, if you have Dynamics Telephony Integration (DTI) with your contact center, the callback will be automatically presented to an agent at the appropriate time and date.
If you have Outlook integration for CRM, the callback may be managed there too.
In Dynamics Telephony you can save all your frequently used contacts in your Phone Book. Then you can one-click call, or transfer to, these contacts. Also, the contacts in the Phone Book can be monitored for Presence – see here for more details.
NOTE: You can configure the number of columns your Phone Book displays using Menu > Settings > General Settings > Phonebook Columns
If you want, you can easily use the same Phone Book for all users. This way, when you edit the Phone Book (see below), all users automatically get the updated Phone Book.
You could set up one Phone Book for all users, or one for each group.
Sample ( without presence )
<?xml version="1.0" encoding="utf-8"?>
<PhoneBook xmlns:xsi="http://www.w3.org/2001/XMLSchema-instance" xmlns:xsd="http://www.w3.org/2001/XMLSchema">
 <Contacts>
<TeamMember>
<uri>2000</uri>
<name>Reception</name>
</TeamMember>
<TeamMember>
<uri>2002</uri>
<name>Gregorie</name>
</TeamMember>
<TeamMember>
<uri>2003</uri>
<name>Anne</name>
</TeamMember>
 </Contacts>
</PhoneBook>
You can monitor the presence (or status) of the people entered in your Phone Book (assuming they “publish their presence”). Presence is published by SIP users, and some other systems too.

 <TeamMember>
 <id>10</id>
 <name>Polly Curtin</name>
 <uri>sip:ponct1@iptel.org</uri>
 <presence>true</presence>
 </TeamMember>
See here for important details on editing the Phone Book.
NOTE: You can also set your own status using the button on the extreme left of the Dynamics Telephony toolbar.