You have just installed Sales Call Accelerator (SCA) from Microsoft AppSource. Here are your next steps
Summary of next steps
1. Read about your SCA trial period.
2. Set which Unified Apps and Users can use SCA
3. Set the phone number of the users that will use SCA
4. Make your first test call – get “Welcome” announcement
5. More test calls – get connected to your customers
IMPORTANT: For now, we have a firewall protecting this service. In order for your app to work correctly, you need to send us your public IP address. Simply Google “Whats my ip” to get it. Please email this to us now and we will add it to our firewall
1. Your Sales Call Accelerator Trial
During your free trial period of 14 days, you will be able to make up to 30 calls for free. After that, you can get a further trial period by simply contacting us to extend the trial.
When you are happy with the trial, we will set you up with a permanent licence – free – no monthly charge or anything. You just pay a competitive rate for the calls you make. If you make no calls in a month, you pay nothing for that month! How fair is that?
2. Configure SCA
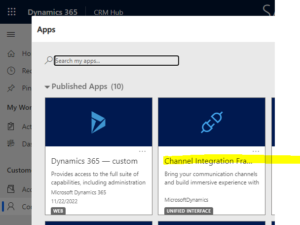
Select the Unified Interface app called Channel Integration Framework
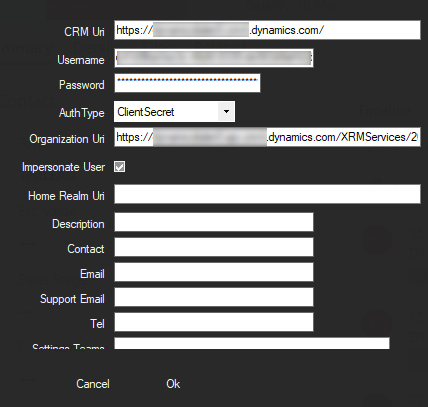
In the app, click New on the toolbar. See instructions under this image for filling the fields
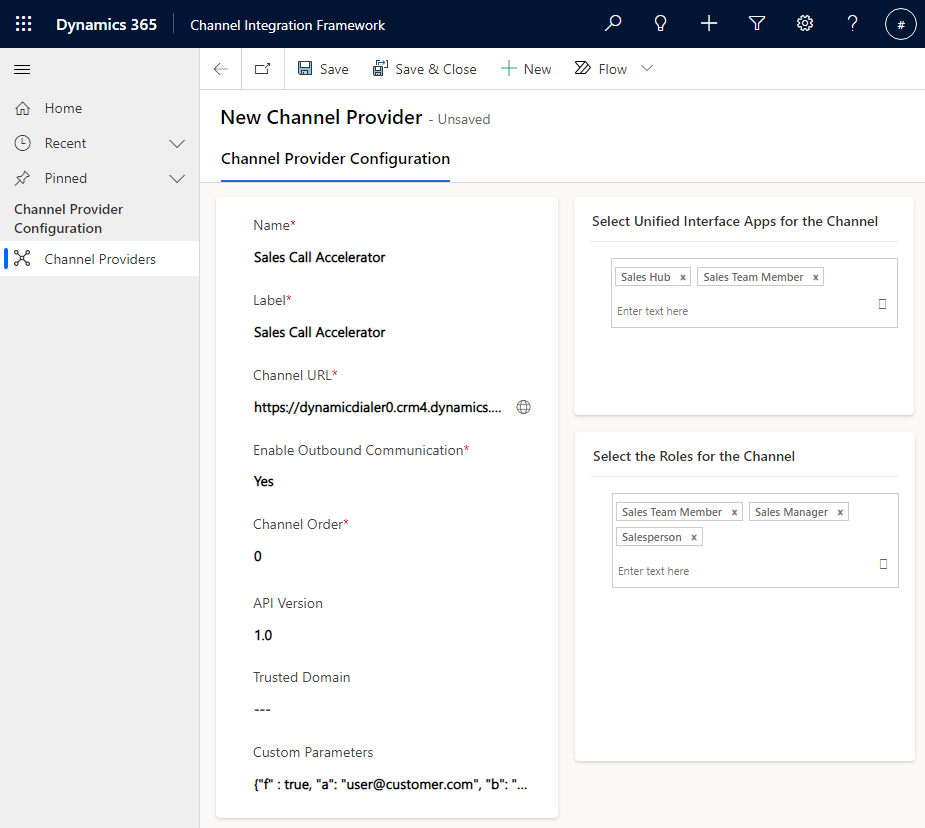
Name: Sales Call Accelerator
Label: Sales Call Accelerator
Channel URL: Substitute your Dynamics 365 URL in the following example: https://your_company.crm11.dynamics.com//WebResources/cts_layout.html
Enable Outbound Communication: Yes
Channel Order: 0
API Version: 1.0
Custom Parameters: enter exactly as shown here – do not change anything… {“f” : true, “a”: “user@customer.com”, “b”: “qW23E1as90frt-der”, “c”: “dtps-dtps-sh.dynamicstelephony.com”, “d”: “wd3”}
3. Set Dynamics 365 User Phone Number
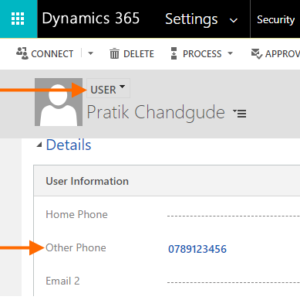
When SCA makes a call, it first calls your own phone. So, you need to tell SCA what your own phone number is. You do this by setting it in Other Phone (address1_telephone2) in the User record in Dynamics 365.
You need to do this for each user that will use SCA
4. Make Your First Test Call
Logon to Dynamics 365 as a user with the Unified App and Security Role configured in step 1 above.
Go to a lead, contact, account, opportunity or quote that has a phone number field. Click on the phone icon beside that field.
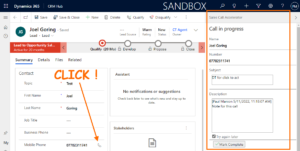
The Sales Call Accelerator side-panel will open. A few seconds later, your phone (as configured in the previous step will ring). Answer your phone. You will hear the welcome announcement.
Add any notes you want and click Mark Complete. For the full user guide, see here.
Your trial has begun. Your next test calls are described in the next section.
5. Make More Test Calls
Calls after the first test call (previous section) will connect you with the phone number you clicked.
The procedure is the same. Click a phone number in Dynamics 365, answer your phone, you hear the call progressing and you can talk to your customer when they answer.
Check out the quick User Guide for full details.
Check out the Troubleshooting Guide if you have issues