In today’s competitive market, exceptional customer service and customer engagement is about delivering more personalized experiences which will separate your company from the competition. With Dynamics Telephony we can bring the customer straight to you with the minimum of fuss for them and for you. Never miss a lead or an opportunity again with this simple solution.
This blog shows you how – through the use of a web page and a workflow – potential customers can submit their details and receive a personal phone call within a matter of seconds.
How does it work?
Before we go into the technical details we’ll firstly look at a broad overview of how this solution works.
We start by creating a webpage which is where the potential customer will submit their details.
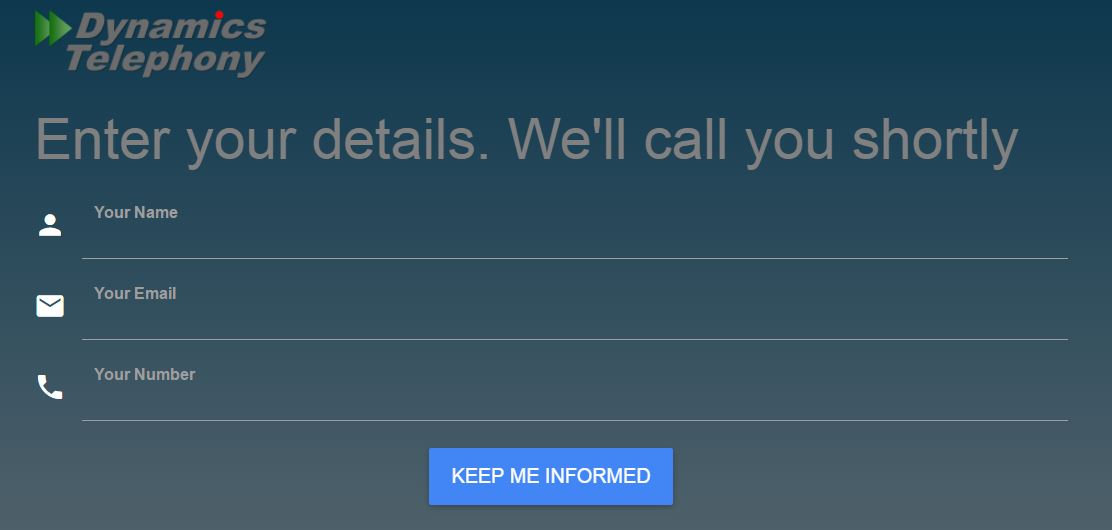 Figure 1 – Webpage
Once the customer has filled in the form and submitted, an email is created which will show up in CRM with the potential customer’s details.
 Figure 2 – Email in CRM
A workflow then kicks off which uses this email to create a new lead.
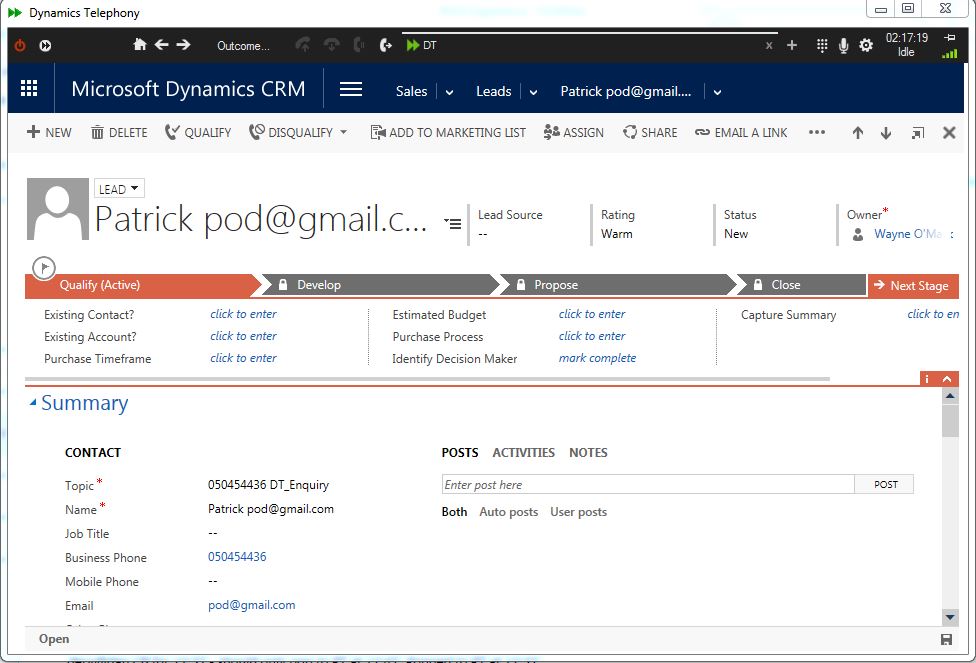 Figure 3 – Lead created from email
A new phone call to the lead is created by the workflow which is entered onto a queue as a queue item. This queue item then automatically pops to an agent that is using Dynamics Telephony, presenting all the data entered by the new lead to them.
 Figure 4 – Lead being popped to agent as queue item
How to create it?
Webpages
The first step is the creation of a webpage. As can be seen in figure 1, a simple webpage to capture a name, email address, and a phone number is required. The sample page shown can be viewed here.
The webpage is accompanied by a PHP file which captures the details and sends them as an email. The PHP file code can be viewed here.
The webpage and PHP files are just for reference – your company website administrator should be able to create these without difficulty.
The next step is to ensure that the inbox that you’ve selected is correctly synchronized with CRM. We show you here how to sync a yahoo email address with CRM.
In CRM go to Settings > Email Configuration > Email Server Profiles. Click the new dropdown and select POP3-SMTP Profile.
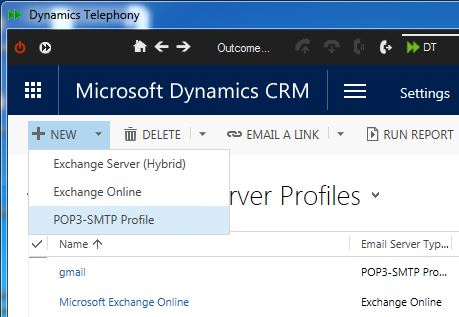 Figure 5 – New email server profile
Now fill out the general section as shown.
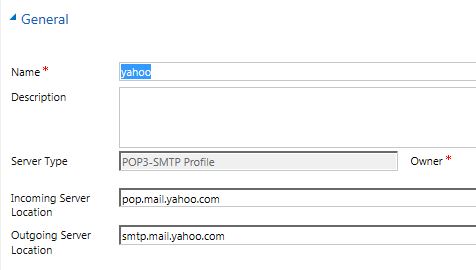 Figure 6 – Yahoo server profile, general
Credentials.
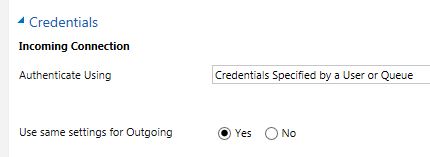 Figure 7 – Yahoo server profile, credentials
Advanced. The time and date seen are the dates of creation.
 Figure 8 – Yahoo server profile, advanced
Save and close the new email server profile. This will now be used as part of setting up your yahoo mailbox in CRM.
Navigate to Settings > Email Configuration > Mailboxes. The owner and regarding fields are yourself. Give the mailbox a suitable name and enter the email address that you wish to use (remember that it must be a Yahoo email address).
Also ensure that “Is Forward Mailbox” is set to No.
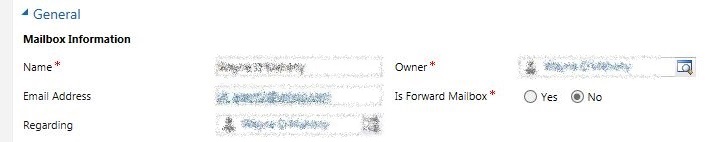 Figure 9 – Mailbox, general
The next sections to fill out are Credentials and Synchronization Method. Enter your email user name and password for your Yahoo email. Select yahoo as your Server Profile. The other configurations are shown in figure 10.
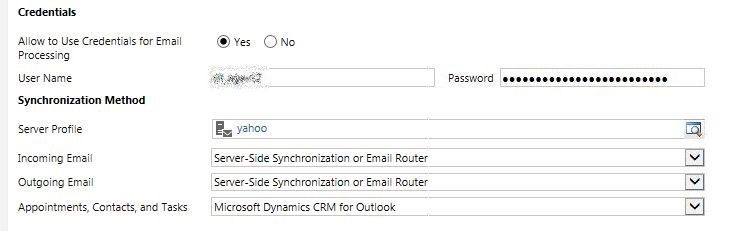 Figure 10 – Mailbox, Credentials and Synchronization Method
The final steps to configuring the mailbox are to Test & Enable Mailbox and Approve Email, shown below in figure 11.
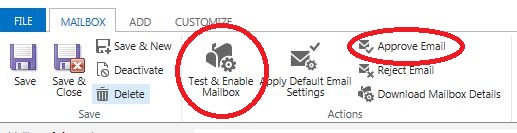 Figure 11 – Mailbox. Test, Enable, and Approve
Click Test & Enable Mailbox and click OK without checking any boxes. Click Approve Email and click OK again.
In your alerts there should be three messages informing you of successful configuration for incoming and outgoing email. There may also be a message about Appointments, contacts and tasks can’t be synchronized, that’s fine.
 Figure 12 – Email configuration alerts
Workflow
Nearly there!
The final step is to create the workflow.
Begin by going to Settings > Processes. Click New and give your Workflow an appropriate Process name. The Category is Workflow and the Entity is Email.
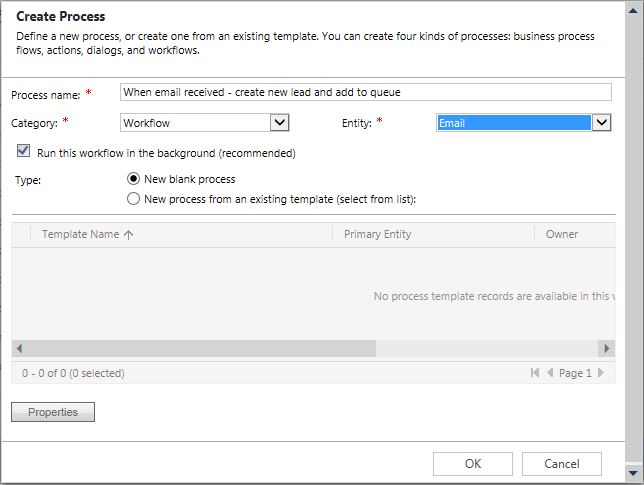 Figure 13 – Workflow setup
Fill out the general information as shown in figure 14. We want the scope to be the organization. The Start When is Record is created (when CRM receives a new email it is treated as a new activity).
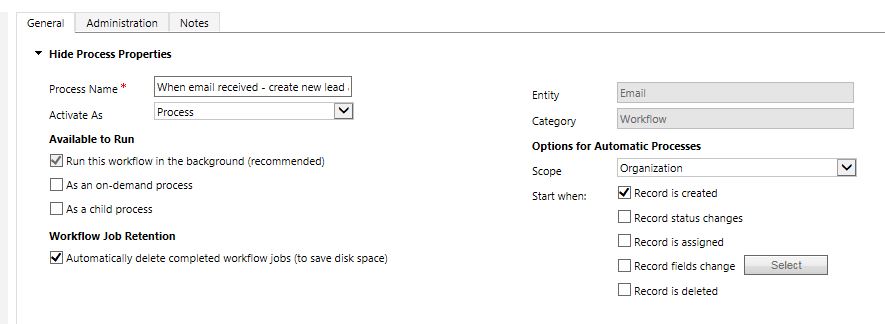 Figure 14 – Workflow setup, general
Now we move onto adding steps. The first step is a check condition. We use a check condition to check whether or not the new email activity contains a certain subject.
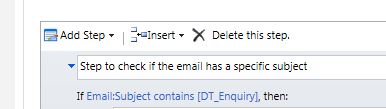 Figure 15 – Workflow setup, check condition
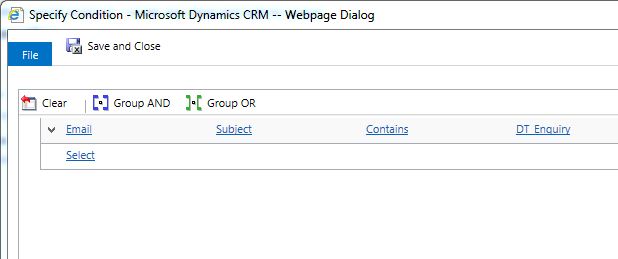 Figure 16 – Workflow setup, check condition
In figure 16, we are checking to see if the new email activity contains “DT_Enquiry”. This text was configured as part of the PHP file – your website administrator can tailor this to your own needs.
Save and close this window. Highlight Select this row and click Add Step to create the lead.
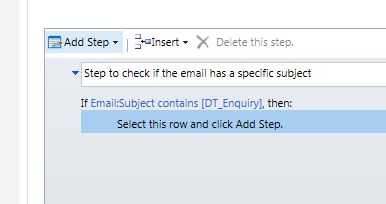 Figure 17 – Workflow setup, create the lead
Click Create Record. Enter a description, select Lead from the dropdown and click Set Properties.
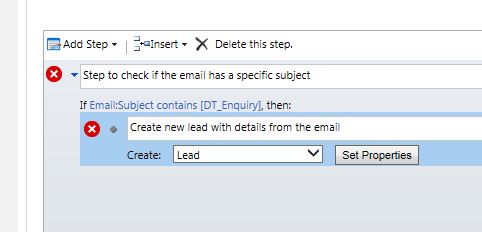 Figure 18 – Workflow setup, lead configuration
The configurations for the new lead are shown in figures 19 and 20.
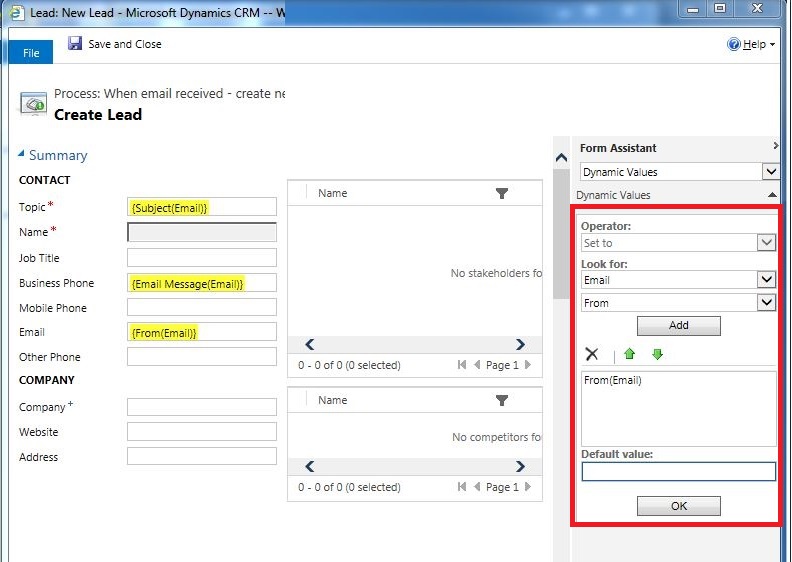 Figure 19 – Workflow setup, lead configuration
The highlighted area in red is where the field inputs are selected from.
 Figure 20 – Workflow setup, lead configuration
A potential customer may or may not enter their full name – we use their email as a last name for the moment. The lead’s details can be amended for more accuracy afterwards.
Next, we create a new phonecall activity. Click Add Step and Create Record. Enter a description and select Phone Call.
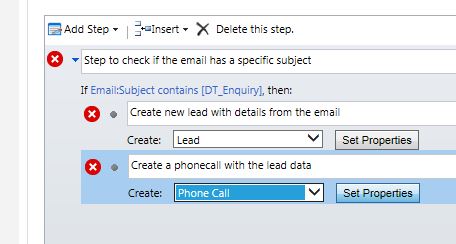 Figure 21 – Workflow setup, Phone Call configuration
Click Set Properties and enter the details as shown in figure 22.
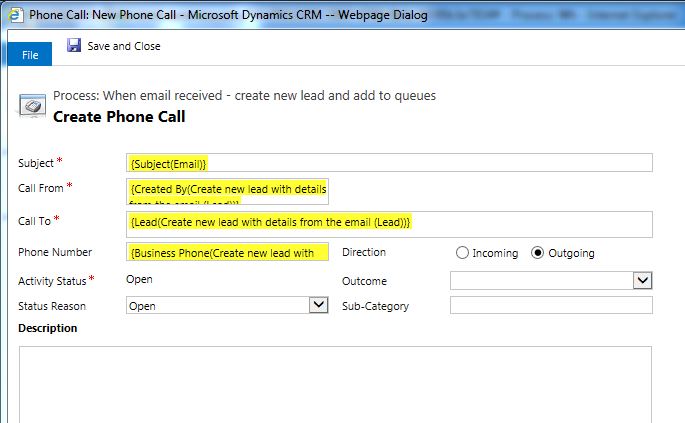 Figure 22 – Workflow setup, Phone Call configuration
The only tricky part here is that for Call From, Call To, and Phone Number, instead of selecting Email in the look for section, scroll down to Local Values in the dropdown and select the description you entered for the new lead created (workflow shown has Create new lead with details from the email).
Final step – click Add Step and Create Record once more. This time we are creating a Queue Item.
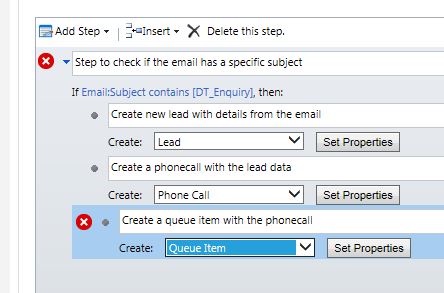 Figure 23 – Workflow setup, Queue Item configuration
Click Set Properties and enter the details as shown in figure 24.
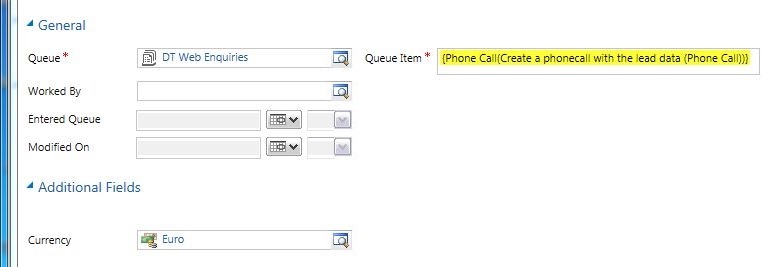 Figure 24 – Workflow setup, Queue Item configuration
The Queue in this case is whatever queue you decide to store these potential customers.
And that’s it! The workflow is now complete. Don’t forget to activate your workflow when it is complete.
 Figure 25 – Workflow activation
Please ensure that emails are coming to your own yahoo inbox as well as your CRM email activities. Leads will then start popping to your agents without them lifting a finger.
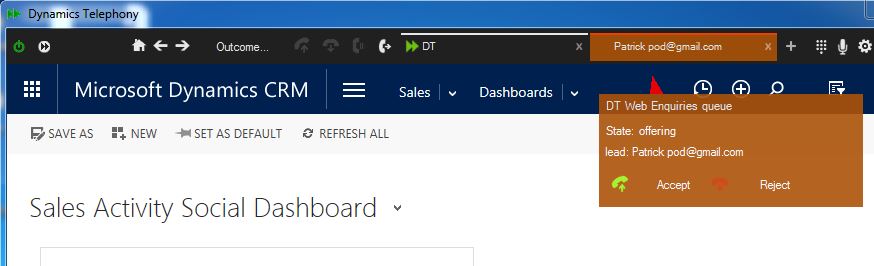 Figure 26 – Web leads converted to queue items