This workflow will be available to a lead, or set of selected leads. It will create a phonecall for each lead and put it in your personal queue. Now, with Dynamics Telephony Queues enabled, you can process each lead using the progressive dialer.
How it is used
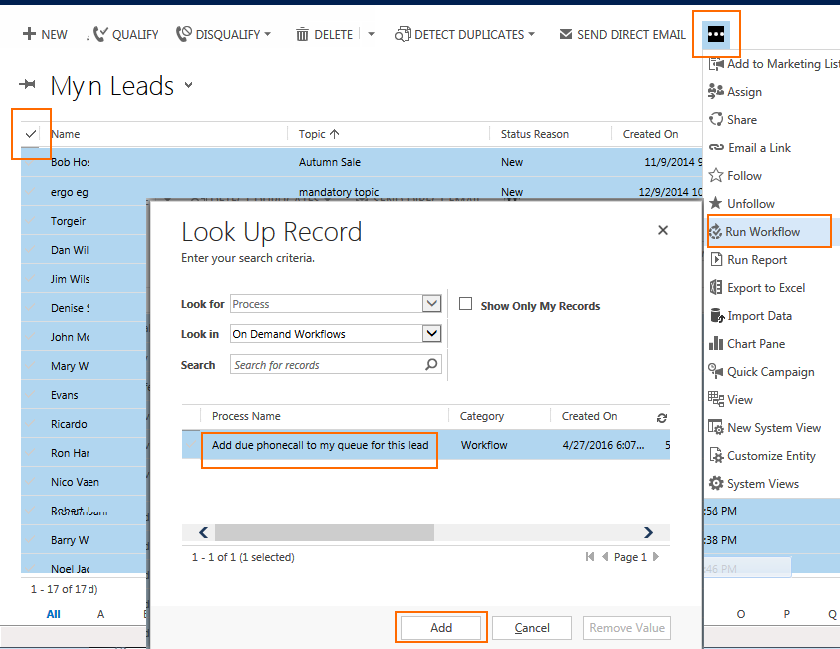
Filter down to the leads you want to add to progressive dialing. Select all and run the workflow per this screen shot.
A more specific search can also be done using Advanced Find to get the leads that you need. Start by opening the Advanced Find window.

Next, make the selections needed in order to get the desired results. In this case, the search is for Leads that have an Address 1: County which Contains the text Tipp.

Click Results to bring back all the leads which fit the search, then run the workflow.
How to make the workflow
Two workflows are required for this to work correctly. An on-demand workflow as well as a child workflow must be created. The reason for this is to access the current user.
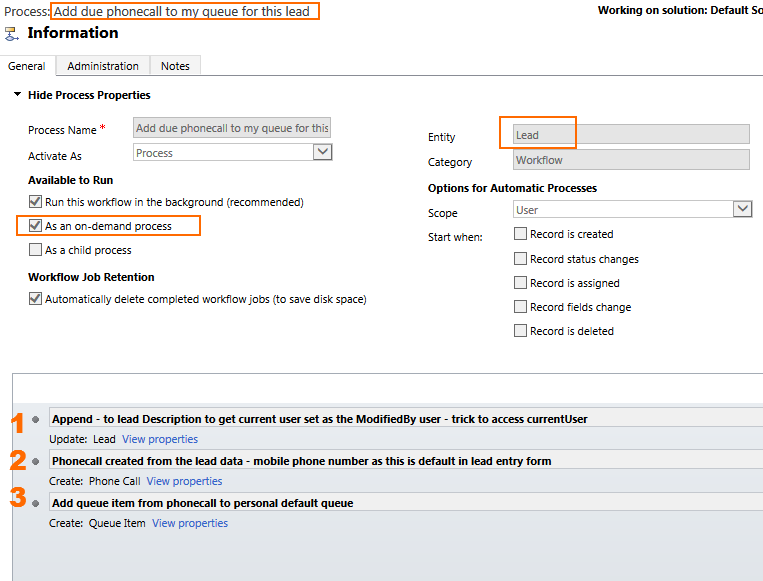
First, create the child workflow as per the screenshot below.
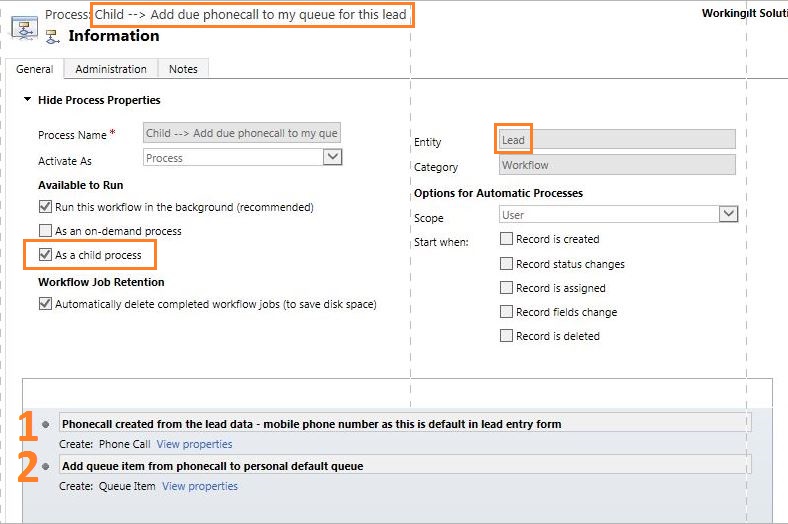
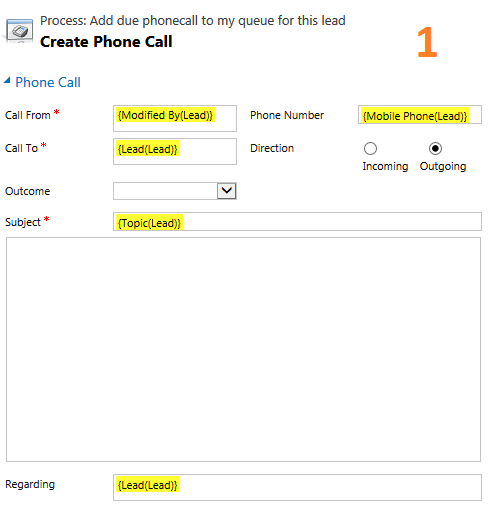
Step 1 creates the phonecall setting the various fields as shown
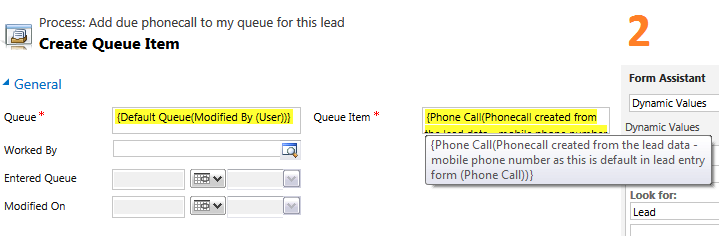
Step 2 create the queue item specifying the current users queue
Now that the child workflow has been created and saved, the next task is to create the on-demand process which will call the child process.
Create a new workflow as per the screenshot below. This workflow is on-demand and uses entity lead.
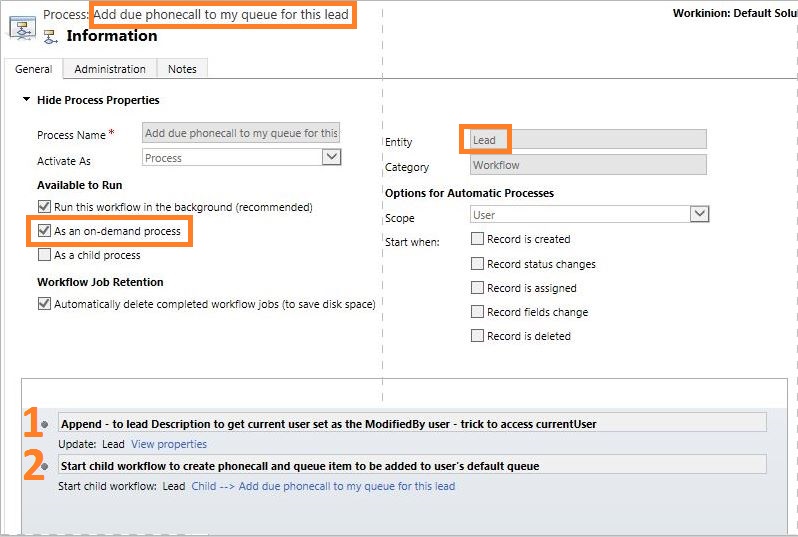
Step 1 is to update the lead so the “Modified By” user gets set to the current user. In this way, the next step can get the current user. This is a well known trick to access the current user.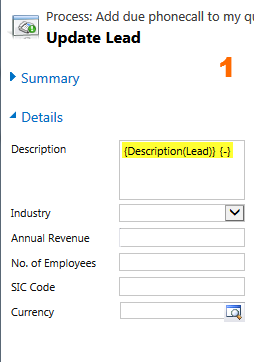
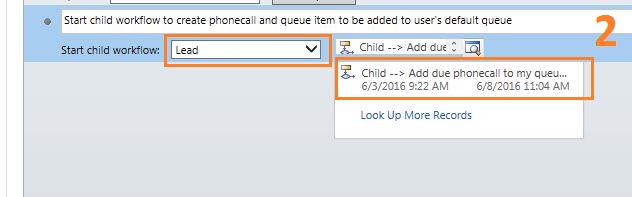
Step 2 is Start Child Workflow. Select Lead from the dropdown to see the child processes on a lead entity. Then select the child process for the next selection by clicking the lookup.
Once complete, ensure to activate both workflows.
