The FIRST time you install a client requires special procedures. Follow the instructions below.
What you will need:
- Telephony Registration Details (e.g. for SIP you need the SIP server/host, username and password)
- URL to your CRM instance.
- The Service User details. See here for more. This user is referred to as dt_user below.
- Once you have the above, the install will take less than 10 minutes.
Steps
- Install the CRM Solution from the link sent to you.
- Client install. Go to the link sent to you in your contract email and click Install to download the click-once installer (setup.exe). You can do this in parallel with step 1 above but pause at step 6 below until the solution import is completed OK.
- You may be prompted to install Visual C++ Runtime before the main install of Dynamics Telephony, if it is not already present on your PC.
- Run the installer, and follow on-screen instructions. It takes less than a minute. Depending on your virus checker and environment, you may have to click to trust the publisher a few times.
- Dynamics Telephony starts automatically.
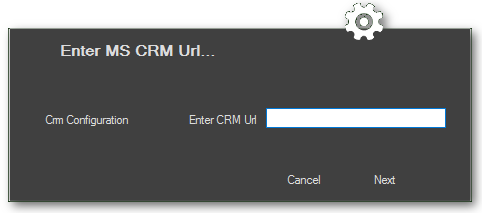
- Enter the base CRM URL determined in “What you will need” above in the screen shown
- Only for first time install of the first client, you need to enter username and password as shown below. Pick Auth Type OAuth or Client Secret. Microsoft no longer support Office 365 for this type of user.
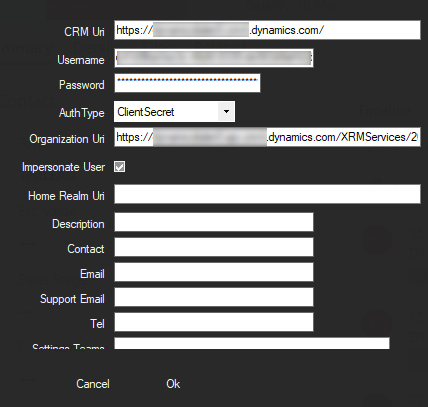
NOTE: If this step has been done before, then all the fields in the screen above will auto-fill once you enter the CRM URL and click/tab out of that field.
- This part can take a minute or 2 (only for the first client)
- From within Dynamics Telephony, logon to Dynamics CRM as a normal user, (not the “dt_user”, although this is allowed).
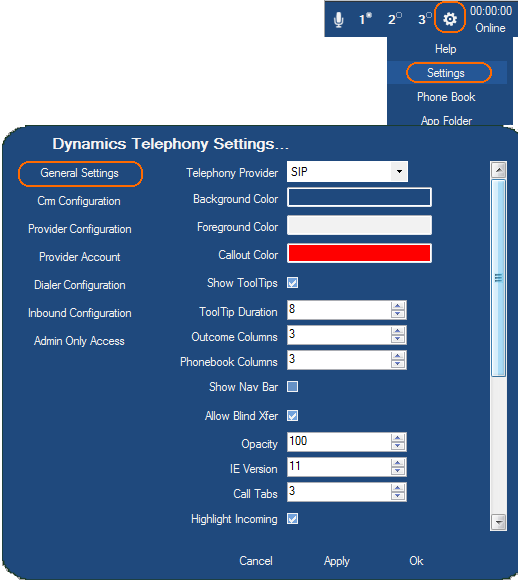
- Go to Menu > Settings, in the default (General Settings) tab, select the type of telephony provider you want to use.
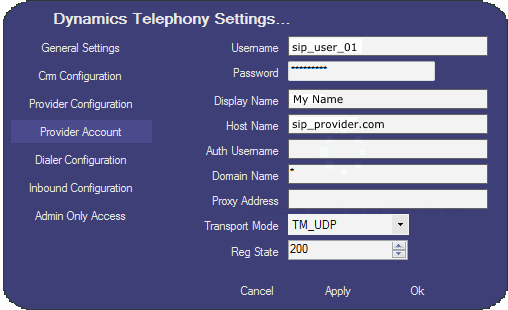
- Then click the Provider Account tab. Fill in your own Specific telephony settings as highlighted below.
- If you have Windows Firewall running, you may be presented with an “Allow Access” dialog. You must allow this access for Dynamics Telephony to run.
- Make a test call by clicking on a phone number in CRM