Category Archives: IT Guide

For IT to prepare, install and maintain Dynamics Telephony

Use Custom Forms

Dynamics Telephony allows you to specify a Custom URL to use for your outbound or inbound calls. So, if you have designed a custom form for users to process inbound or outbound calls, then you can have Dynamics Telephony pop that form for the user.

You can specify different Custom URLs for inbound and outbound. And you can also specify a set of conditions for when to use the Custom URL, such as only when no match for the caller is found in CRM, or only when the caller is a contact, etc.  You can specify multiple Custom URLs, each with a different set of conditions attached.

In addition, Dynamics Telephony will pass a set of parameters to your page at the Custom URL. These are described below.

How to set up a custom URL

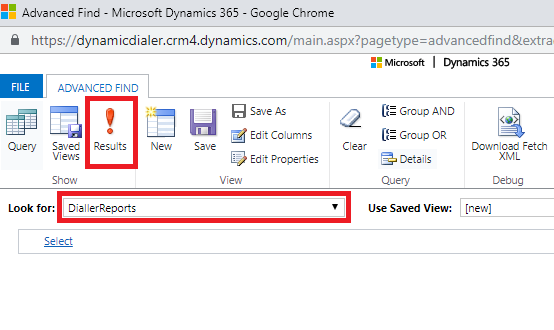
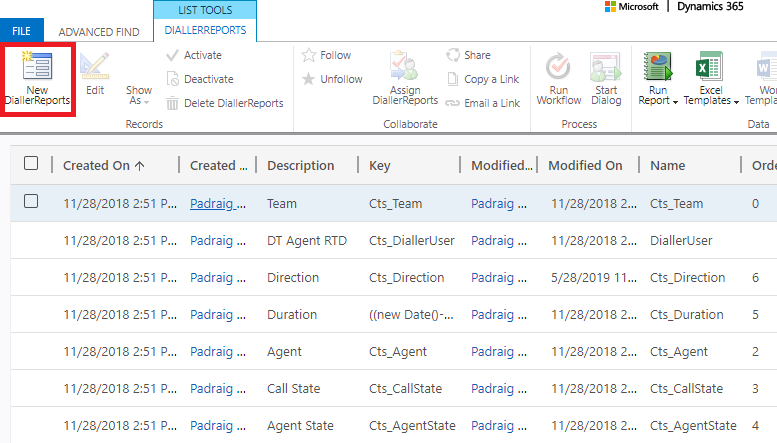
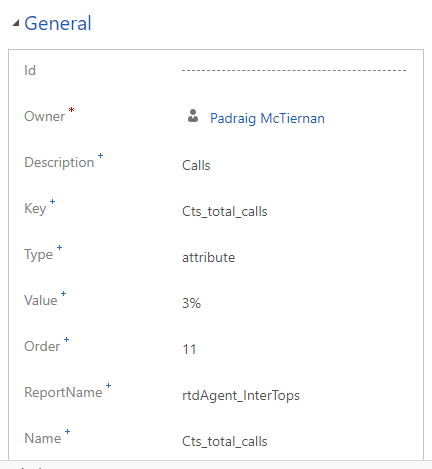
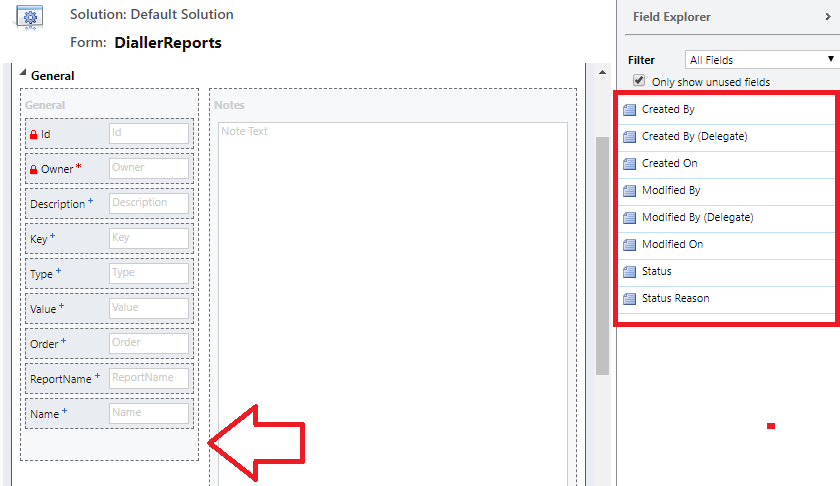
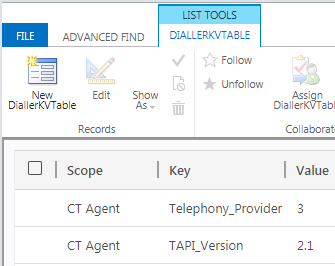
You configure the URL to pop, along with the conditions for the pop, as a dialerKVTable entry, with these values:

Owner. This can be any owner.
Scope. Only “global” has been tested. This means it applies to all users. In future, we may support putting a users name here to make it specific only to that user.
Parent. Leave blank always
Name. Always customURL_Rule. It is case sensitive so type as shown.
Key. A number. Start at 1 for the first rule, 2 for the second etc. The rule with the lowest Key number that the condition (next section) yields TRUE will determine the pop. If no rule yields TRUE, then the default contact, lead etc. is popped. NOTE: the sorting is text based so you should use 2 digits for all numbers, like 01 or 12 etc.
Value. Format condition=>url-to-pop
url-to-pop can be any valid URL. Only webresources served by the CRM have been thoroughly tested. The keyword default can be used instead of a URL to pop the default CRM form for the matched entity.
condition is one or more conditions where you specify such things as applicable entity (fromParty.Key=contact, lead, account.), number of matches (lookupCount=0 or 1), DNIS (dnis=1234), and direction (inbound or queue)

See next section for examples of Value

Some examples of Value

direction=queue=>file:///C:/_cts/Fast%20n%20Lite/page.html

direction=inbound&&fromParty.Key=contact&&lookupCount=1=>https://yourCrm.crm.dynamics.com//WebResources/dot_/CPO/CP.html

direction=inbound&&lookupCount=0=>https://yourCrm.crm.dynamics.com//WebResources/dot_/CPO/CP.html

direction=inbound&&fromParty.Key=account&&lookupCount=1=>https://kotsovolosdev.crm4.dynamics.com//WebResources/dot_/CPO/CP.html

direction=inbound&&dnis=1234=>default

Parameters passed to the Custom URL

TIP: When you run a test call, check the Dynamics Telephony log file (DT Menu > Log File) to see the URL and it’s parameters. Search in the log file for oCustomUrlRules and you will see the URL a line or two after that.

Parameters
Data=
state, e.g. incoming
type, e.g. phonecall. Only phonecall supported
phoneCallID, e.g. 7e2a5311-be86-e911-a84d-000d3ab0d976
direction, e.g. inbound, or queue (outbound)
telephoneNo, e.g. 00353868561713
dnis, e.g. 1234
dnisName, e.g. DEV
agentType, e.g. systemuser
agentId, e.g. dbe7f238-1d8d-e911-a819-000d3aba212d
customerType, e.g. contact
customerID, e.g. dbe7f238-1d8d-e911-a819-000d3aba212d
ReType, e.g. contact
ReId, e.g. dbe7f238-1d8d-e911-a819-000d3aba212d
dtCallId, e.g. e8393a0f-be86-e911-a847-000d3ab0d281
agent, e.g. Test+Agent06
fullName, e.g. My full name
description, e.g. description+text+from+phonecall
customText, e.g. text from a phonecall custom field called new_customtext
subject, e.g. inbound+call+with+DNIS+DEV

Sample URL popped with parameters
CP.html?Data=state%3Dstart%26type%3Dphonecall%26phoneCallID%3D30240805-03be-e911-a82f-000d3ab71acc%26direction%3Dqueue%26telephoneNo%3D6946186715%26dnis%3D%26dnisName%3D%26agentType%3Dsystemuser%26agentId%3Da661cc8a-eb7a-e911-a824-000d3ab70af3%26customerType%3Dcontact%26customerID%3De79beb12-998b-e911-a825-000d3ab70627%26ReType%3Dcontact%26ReId%3De79beb12-998b-e911-a825-000d3ab70627%26dtCallId%3D7f22a4f1-7fe6-e911-a838-000d3ab713ee%26agent%3DDyn+Crm06%26fullName%3D%CE%9D%CE%95%CE%9A%CE%A4%CE%91%CE%A1%CE%99%CE%91+%CE%9A%CE%95%CE%A6%CE%91%CE%9B%CE%9F%CE%9D%CE%99%CE%9A%CE%91%26description%3D%26  %3D%26subject%3D%CE%95%CE%9A%CE%A3-06441+-+MRKT-0010324

Moving to a new CRM

This post gives you guide on how to move your Dynamics Telephony configuration from one CRM to another.

The example is for porting from CRM1 (where you have tested everything to your satisfaction) to CRM2 (where you want to replicate the tested settings)

FIRST install the solution on CRM2. Use the link provided by your support engineer.

NEXT run Dynamics Telephony on CRM2. You do this by clearing the cache ( see here ) and starting Dynamics Telephony again. You will be prompted for the URL of CRM2. IMPORTANT, once up and running, manually set items in Menu > Settings > Crm Configuration, as these cannot be ported over in the “Port Data” described below. Quit that instance of Dynamics Telephony.

THEN, Port Data between the Dynamis Telephony entities in CRM as follows…

CRM entity dialerKvTable – Delete all rows from CRM2 where scope equals global. Export all rows from CRM1 where scope equals global and import into CRM2

CRM entity dialerCallOutcome – Delete all rows from CRM2. Export all rows from CRM1  and import to CRM2.

CRM entity dialerDnis – You will have to manually re-create all DNIS Settings in CRM2. This is because the CRM URL is part of the DNIS definition. Also, the images for the DNIS are stored as webresources in CRM – which have the same name as the DNIS. Advanced users could manually fix the URL in the DNIS definition and port over the image webresources in a solution.

CRM entity dialerQueueSettings – You will have to manually re-create the Queue Settings on CRM2. This is because the CRM URL and the queue GUID is part of the Queue Settings.

CRM entity dialerReports –  If you have made any custom report definitions for the Dynamics Telephony RTD, then you can port these to CRM2. Delete all rows from CRM2. Exports all rows from CRM1 and import to CRM2

How to add an RTD column

You can easily add columns to the Agent RTD. The steps below show you how to add a total “Calls” column.

Steps

1.In Advanced Find, go to DiallerReports, use any view you like and click Results. AdvancedFind

2. Then you click New DiallerReportsDiallerReportsTable


3. Here you click on the dashed lines to set/change the propertiesReportFields

For example, if you wanted to add a ‘Total Calls’ report, you could set it up like this. TotalCalls

Description is what will appear at the top of the column when in a          table.
Key is the source of the data to be displayed.
Type is the data type. Here it is attribute. Other types include rule,        filter, calculated and livestate. These will be discussed in another          post.
Value is the column width in percent for attributes. For other types      in can be different.
Order is the order in which the columns will appear. If you want to        put a new column in the middle, the following columns will have to      be manually shuffled forward.
ReportName is the report into which the column will be put.
Name is the name which can be used to cite this data in another              report.


4. If you want to change the fields available, click form editor and drag fields from the right toolbar into the column on the left to add them in, or out of the left column to remove themAddFields

Spellcheck Language

You can set the language to use for spellcheck within Dynamics Telephony. This would be used, for example, when composing an email in Dynamics Telephony. You can set it to one or multiple languages.

spellcheck_language

Examples

Use this for UK English
browser.enable_spellchecking=true;
spellcheck.dictionaries=[“en-GB”];

Use this for Spanish
browser.enable_spellchecking=true;
spellcheck.dictionaries=[“es-ES”];

This for US English
browser.enable_spellchecking=true;
spellcheck.dictionaries=[“en-US”];

Or this for both US English and Spanish
browser.enable_spellchecking=true;
spellcheck.dictionaries=[“es-ES”, “en-US”];

Make a setting global

Dynamics Telephony stores all its settings in CRM. Some are global and some are per user. You can change a user setting and make it global. This will mean that any new users will pick up that global setting as their default setting.

You might use this to, for example, make all new users use a particular telephony connector, when they first run. This would eliminate a manual configuration step that the user might get wrong.

In the following procedure, I will show you how to make a global setting that will default new users to use TAPI. The procedure is the same for other settings.

Set up Dynamics Telephony for one user and set their telephony to TAPI and their TAPI version to 2.1.
Close the Dynamics Telephony application

Run an Advanced Find in CRM on DialerKvTable to find the setting below
global_kv_tapi_1


Change the “scope” value to “global”, per this snap.
global_kv_tapi_2


Install a new user and they will default to TAPI 2.1


Client Rollout Options

Dynamics Telephony supports a number of client rollout options to make the experience trouble free for all organization sizes.

GLOBAL SETTINGS

All Dynamics Telephony settings are stored in CRM. This means you can pre-configure all users telephony settings. This can apply to any of the install options below. The items you would pre-configure are:

  • All users default telephony (e.g. TAPI, Skype for Business, etc. )
  • Individual user’s preferred telephony
  • Telephony setting such as server, username and password
  • Colors and preferences.


INSTALL OPTIONS

1. Install as click-once from Dynamics Telephony servers

This install can be done by end-users. the steps are

  1. Go to the install URL (that you would include in the instructions email)
  2. Download and run the setup.exe (If there might be security prompts in your environment, these should be dealt with in your instructions email)
  3. When prompted, enter the URL of the CRM (that you would also include in the instructions email)
  4. When Dynamics Telephony starts, go to Menu > Settings and pick your telephony provider from the list. For TAPI and Skype for Business, no further settings are required. For others, a username and password are required. NOTE you can also pre-configure all user’s settings in CRM to eliminate this step 4 completely. See GLOBAL SETTING above

We will help with defining this rollout procedure during the on-boarding process.

2. Install as click-once from your own server

Dynamics Telephony can provide you with the click-once install files for you to host on your own server. The install procedure would be the same as above. Advantages include:

  • No dependence on the internet-based Dynamics Telephony servers
  • Ability to prevent update rollout until you have verified compatibility with your needs.

Contact us for more information on this service.

3. Install from MSI provided by Dynamics Telephony

Dynamics Telephony can provide you with an MSI customized to your organization’s needs. Advantages include:

  • Enables a completely silent install with no intervention from the user or IT.
  • Specify the CRM URL for the user to use – normally this is entered by the user. With an MSI, this can be pre-configured.
  • All other settings, such as the users telephony settings, can be pre-configured too per GLOBAL SETTINGS above.
  • Customize aspects of the install such as application location, additional help files, shared phone-book location.
  • Ability to prevent update rollout until you have verified compatibility with your needs.
  • Additional customizations such as registry entries to simplify telephony driver install.

Please contact us for more information on this service.

4. Make your own MSI

See end of this article here


Service User

Dynamics Telephony uses a CRM User we call the Service User. Dynamics Telephony uses the Service User in the background for various install and config tasks. The Service User has sysadmin role in CRM.  You should restrict the permissions once the initial install is done.

The Service User credentials are entered JUST ONCE on this screen. DT will then use this user as the Service User for all users. If you see this screen again (or a user sees it) there is an issue that needs to be resolved. NEVER allow a user enter their own credentials here.


The supported Auth Types are OAuth and Client Secret. Do not use Office 365 as it is no longer supported by Microsoft for this user.

See here for how to set up a Client Secret and Client ID.

Changing the Service User Password

If you need to change the Service User password, then it is best to change it in Dynamics Telephony at the same time as you do it in 365. Have one Dynamics Telephony client open at… > Settings cog > Settings > CRM Configuration. Then make the change in both places and restart all Dynamics Telephony clients.

If you change the password and get locked out of Dynamics Telephony, then follow the procedure below.

YOU ONLY HAVE TO DO THIS ON ONE PC

  • Find dynamicstelephony.exe It is in a folder like:
    C:\Users\user_name\AppData\Local\Apps\2.0\5EMKZVJH.CCT\1V5NVG3J.RQX\dyna..tion_a5dd519732421760_0002.0000_e6f31e9e898701bc
  • Right-click on the EXE and make a shortcut
  • Edit the shortcut and add “/admin” at the end like this

admin_shortcut

Now, when you run Dynamics Telephony using this shortcut, and the connection to CRM fails, you will a the dialog where you can change the service user and password.

Access Required

The Service User needs read-write access to the following in CRM:

  • All entities named starting with dialler…, e.g. diallerUser
  • Phonecall, task, activityparty
  • Account, Contact, Lead, Opportunity, Case, 
  • Systemuser
  • Any custom entities configured with DT.
  • Queues, (plus create on this one:)queueitems
  • (plus create on this one:) Webresources
  • Role, systemuserroles

Dynamics Telephony and Sales Orders

Dynamics Telephony is perfect if you use CRM Orders, where it can pop Orders (if there are any open for the caller) or pop the callers Contact record. Furthermore, the phonecall activities are logged against the Order as appropriate.

How to get Dynamics Telephony to pop an Order based on the callers phone number

Orders have two phone numbers (Bill To Phone Number and Ship To Phone Number) you can use to match against the incoming call. Or, you can add a custom phone number field for Dynamics Telephony to search.

Remember, Dynamics Telephony can be set to search multiple fields in an entity

TIP: Set a condition that the Order must be open (status=active) for the phone number to be populated. In this way, only open Orders will match and pop.

In the custom entity dialerKVtable, add an entry for each phone number field you want to search..
type: phone
Value: new_phone1 – the name of phone number field
scope: global
Parent: <blank>
Name: incomingLookup_salesorder
Key: 1 – the order of lookup in this entity

Also in dialerKVtable entity, add another two entries as follows for the primary text to display
Key: salesorder
Name: entityPrimaryNames
Parent: AppSettings
Scope: global
Type: string
Value: name – *

Key: name – *
Name: incomingLookup_order
Parent: <blank>
Scope: global
Type: name
Value: name – *

NOTE: The above will display the Name of the Order. You might prefer to create another custom field on the Order that combines customer name and Name. This will be useful for multi-match. It must be a string custom field. Replace “name” above with your custom field name (3 places marked *)

In Dynamics Telephony settings > Inbound set..
Lookup entities: salesorder

TIP: If you set above to “contact, salesorder” then Dynamics Telephony will pop the Contact if there are no open Orders. However, if there is one open Order you will get a multi-match to choose between the Order and the Contact. In the multi-match dialog, the Contact will show at the top of the list.