
Chapter 1 - Introduction
Dynamics Telephony is a telephony wrapper for MS Dynamics CRM. The application hosts CRM web pages in browser style tabs and integrates telephony capability seamlessly for each tab.
The Dynamic Telephony client is a ClickOnce application and is normally delivered via an installation link provided by your sales representative. The link will be unique to your organization and will allow your organization to control the update / upgrade path for your version of the application. The application can also be delivered as an MSI package on request.
The proceeding section describes how to install Dynamics Telephony as a clickOnce application downloaded from the link supplied. If you are installing from an MSI package, run setup.exe and start at section 2.2 below.
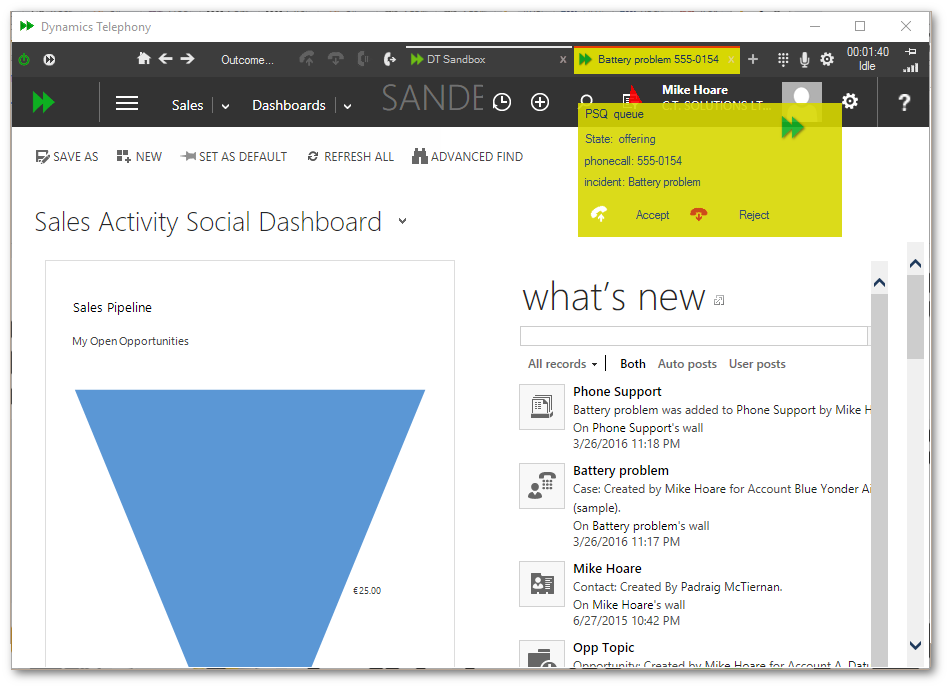
Fig 2.1 - The Dynamics Telephony Application.
Chapter 2 - Installation
2.1 Gettings Started
To install the Dynamics Telephony application, navigate to the installation link given by your sales representative using your browser. A page similar to the one shown in fig 2.1 below should appear. To begin click on the “Install Now” button.
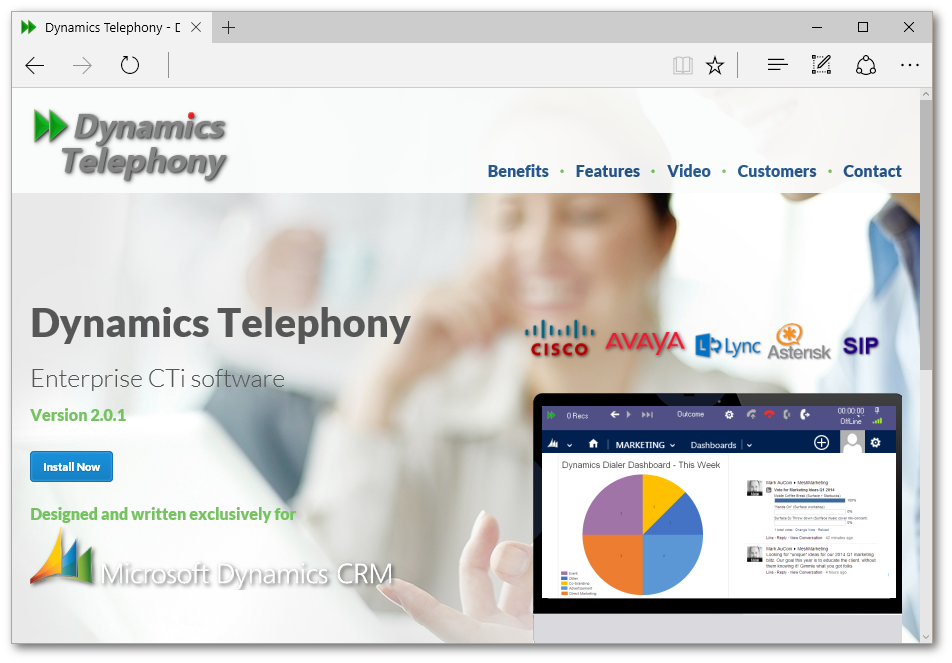
Fig 2.1 - Installation Link
At this time the installation may require users to acknowledge some security questions to continue installation. Future versions of the application may not require these steps. On clicking the install button a warning may appear at the base of of the browser page (fig 2.2), if so, click “Run” to continue.
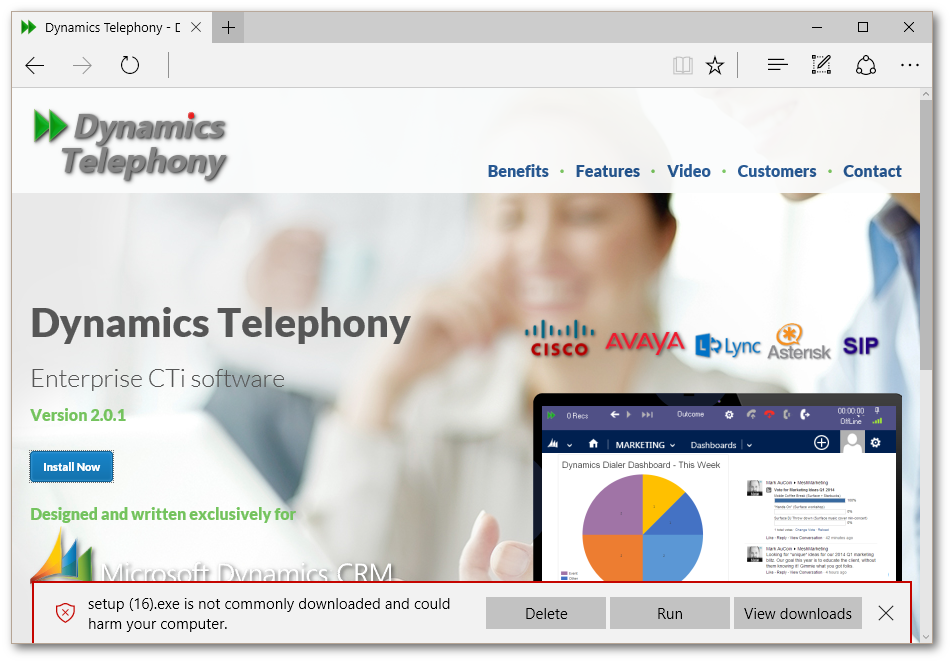
Fig 2.2 - Browser Download Warning
A windows warning may also appear (fig 2.3). Click “More info” (fig 2.3) and then “Run Anyway” (fig 2.4) to continue...
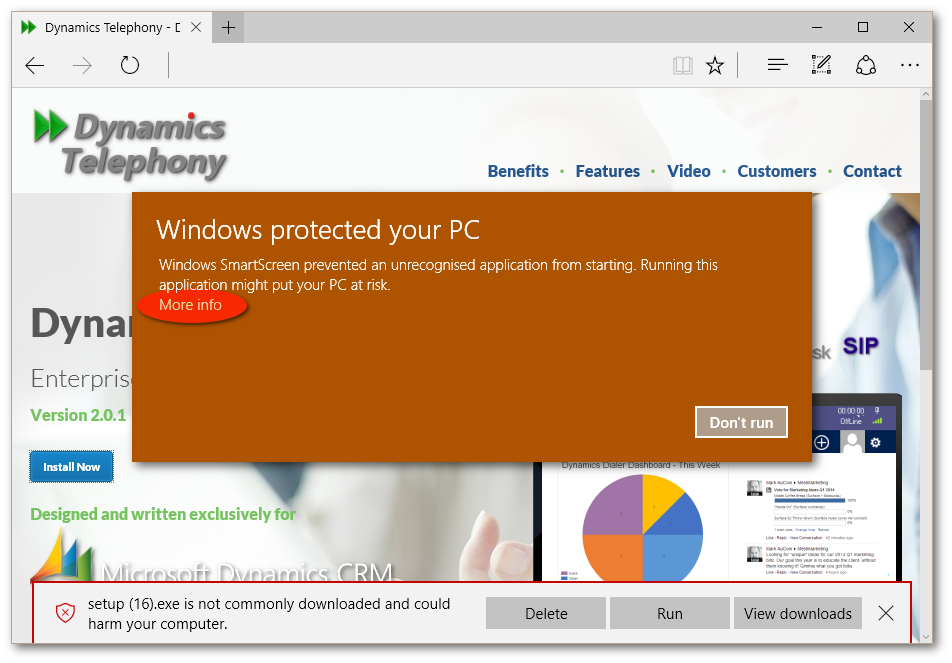
Fig 2.3 - Windows warning - More Info
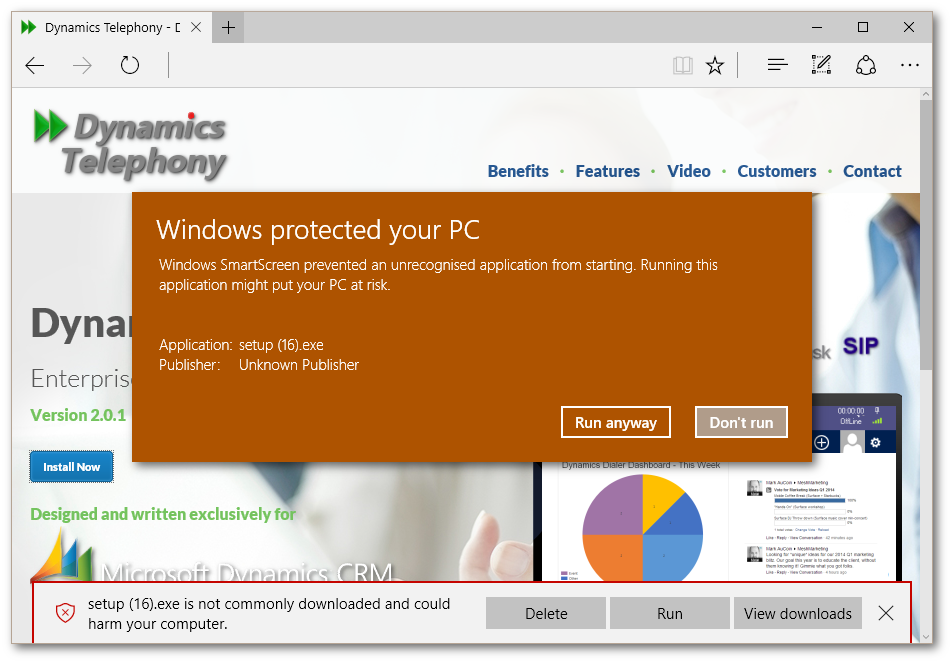
Fig 2.4 Windows warning - Run Anyway
At this point an installation window should appear (fig 2.5), to continue click install...
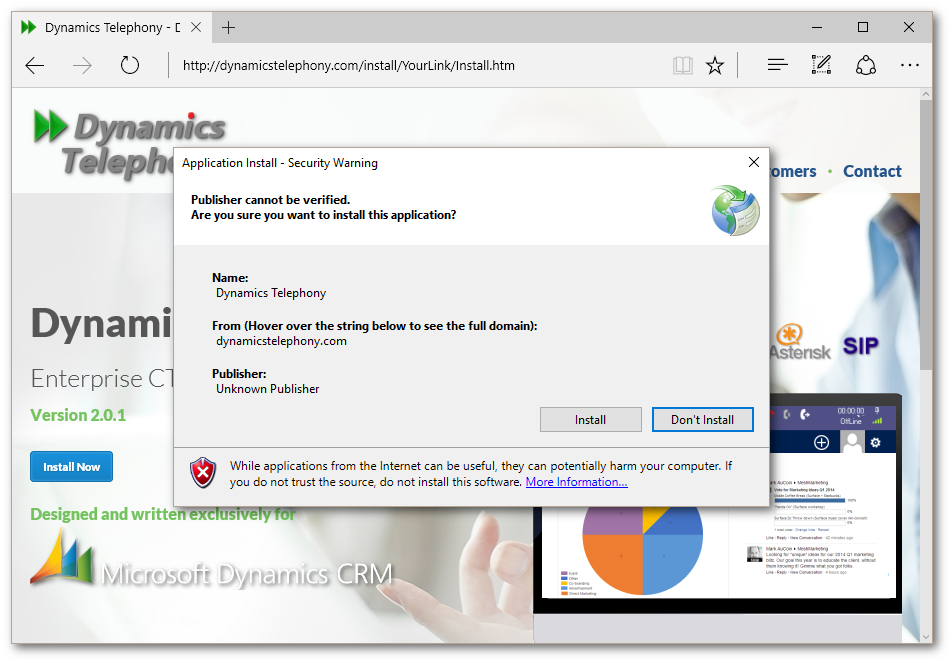
Fig 2.5 - Installation Window
2.2 Starting the app
The Windows warning from fig 2.3 / fig 2.4 may appear again at this stage, if so continue as above by clicking “More info” (fig 2.3) and then “Run Anyway” (fig 2.4). The app will begin loading at this stage. The first time the app is run it will recognize it has not been configured with a CRM url to work with and prompt the user to enter one (fig 2.6). Enter the Url of the CRM to use and click next, apart from the initial install (2.3 below) the app should now have the minimum configuration required and should continue loading as normal.
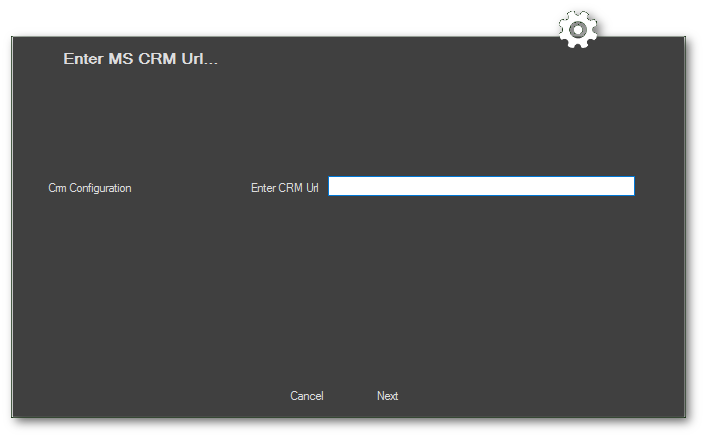
Fig 2.6 - App first run - Enter Url
2.3 Initial Install
The very first time the app is run the app will detect that it does not have valid stored credentials for the Url entered above. At this stage you will be prompted to enter the Username and Password credentials (fig 2.7). This user account is only used by the application internally, and is not used by the users who will login to the Crm as usual. We recommend that you create a “DynamicsTelephony” account for this purpose. This account needs to be a system administrator as it will need to create custom entities to continue . This will also allow for auditing of the DT application if required.
The credentials for this account will be encrypted and stored locally as well as on the server so that proceeding installations can pick up these credentials without prompting. Thus subsequent installations will bypass this section and proceed from Fig 2.6 above to loading the application.
If you need to reset this user you can quit the app, delete the local file containing the encrypted credentials and restart the app to be prompted for credentials again. The file is located at:
C:\Users\<<USERNAME>>\AppData\Roaming\CT Solutions\DynamicsTelephony\config.crm
Where <<USERNAME>> is the currently logged in windows user.
Optionally, You can also enter some other information at this point. The purpose of these optional entries is discussed in more detail in section 4.2 - Crm Configuration.
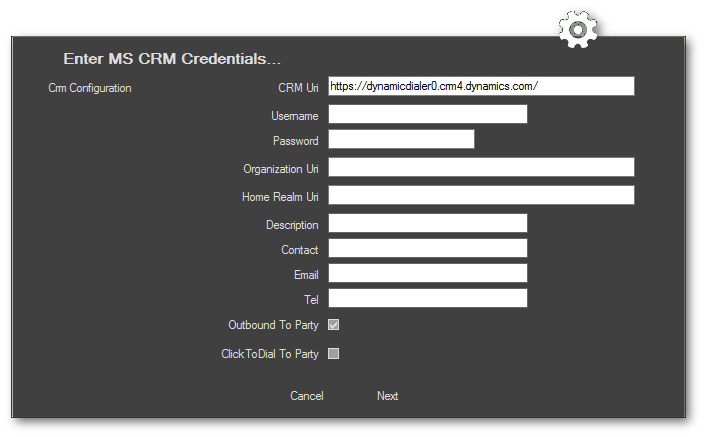
Fig 2.7 - App First Run - Enter Credentials
Having entered credentials and any optional data, click Next to continue. If the credentials enter are not valid the window will appear again allowing the user to edit and try again, after 5 failures the app will quit. Assuming the credentials are valid the installation will proceed and the application will start installing the custom entities required for Dynamics Telephony to run. This one time process can take up to 15 minutes depending on the performance of the CRM. During this time the screen will display details of the entities / attributes it is creating some examples of which are shown in fig 2.8 below.
After this process the installation should be complete and the application should load and be ready for use. Telephony configuration, see sections 4.1, 4.3 and 4.4, will still need to be entered before using the app to make and receive calls.
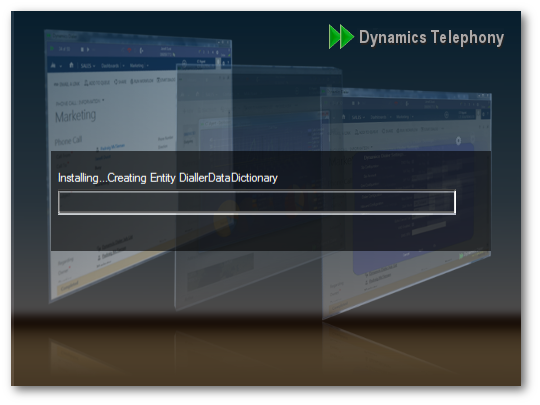
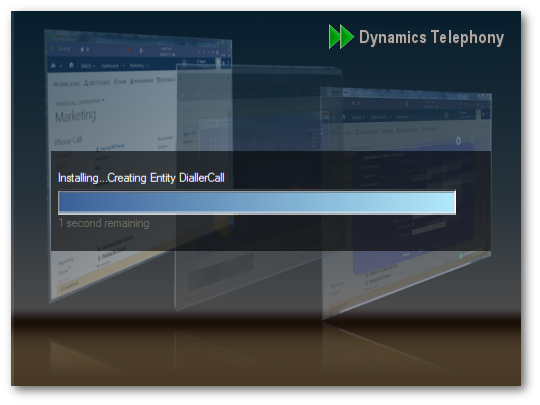
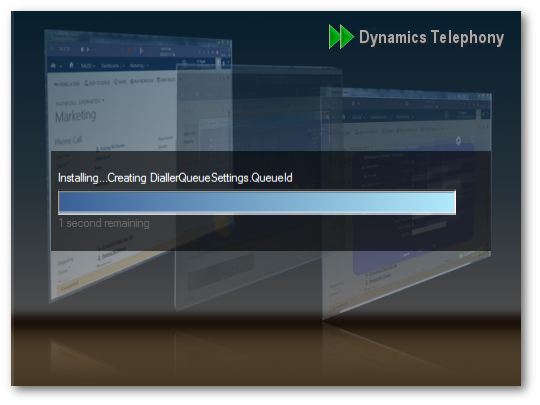
Fig 2.8 - Installing the Custom Entities
Chapter 3 - The Settings Menu
To access the settings menu, hover or click the settings icon on the right hand side of the toolbar. A list of menu items will appear (fig 3.1). Each one is explained in the following sections detail below.
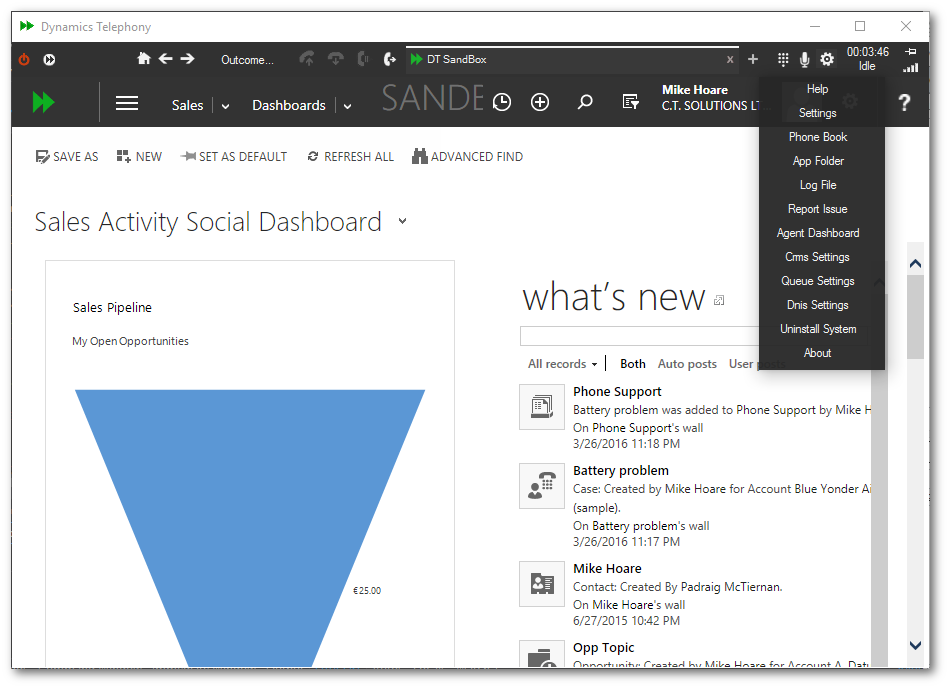
Fig 3.1 - The Settings Menu
3.1 Help
The Help menu item opens the Dynamics Telephony User Guide using the default browser (fig 3.2 below). Use the slideout menu to access the table of contents, which will facilitate quick navigation to any area of interest. It is recommended that all agents familiarize themselves with the user guide before using the application.
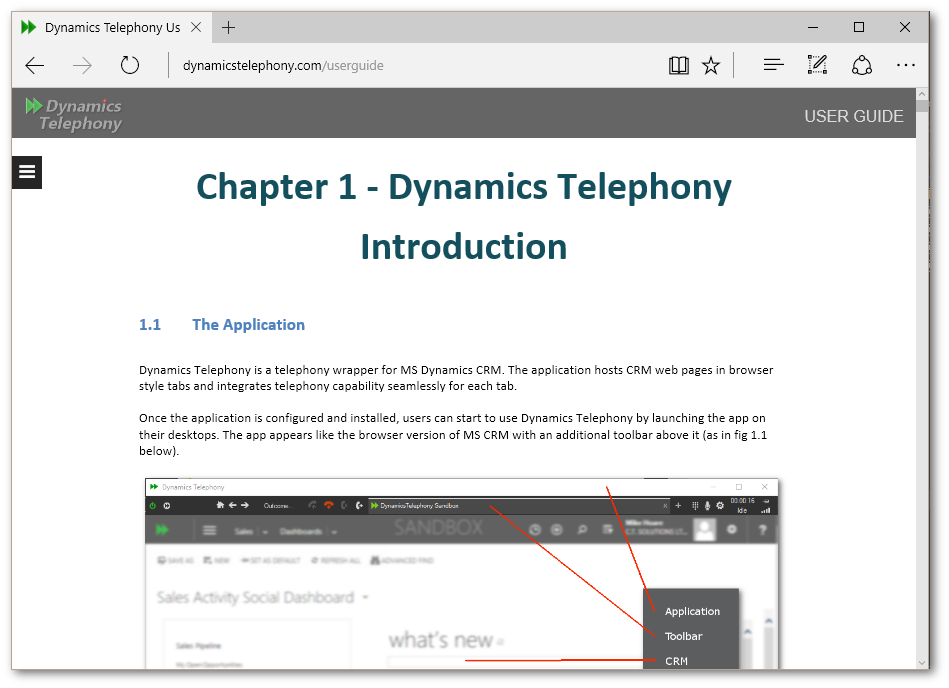
Fig 3.2 - Help!
3.2 Settings
The Settings menu is where the app is configured for basic use. There are several configuration tabs under settings which are discussed in detail in Chapter 4.
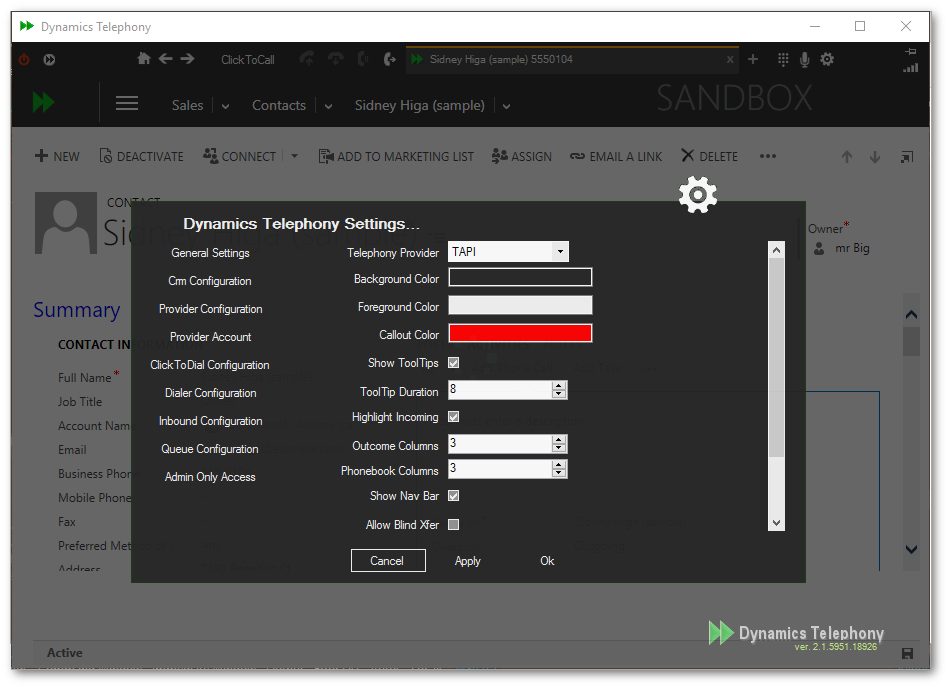
Fig 3.3 - Settings
3.3 Phone Book
The phone book allows users access to a “Speed Dial” list of names / numbers. Depending on the pbx, presence data may also be available for these contacts. The phone book menu item will simply open the phone book xml file in the default xml reader / viewer. To change these settings, familiarity with xml is required. Use your preferred xml editor to add, edit and delete items from the phone book. Set the presence flag to true only is you know that your pbx supports presence.
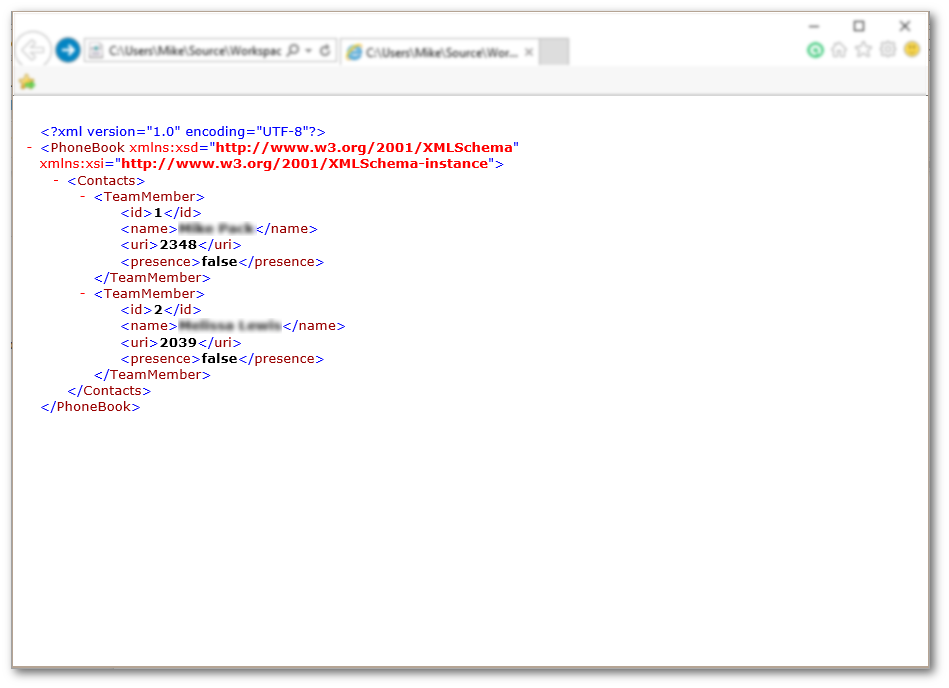
Fig 3.4 - The Phone Book
3.4 App Folder
The Dynamics Telephony client is a “ClickOnce” application. As such it is installed to a folder under the local users AppData\Local folder. The name of this folder varies and will change with each update of the app. To facilitate easy access to the app folder, this menu item will open a file explorer containing the application folder (Fig 3.5). It is a useful feature for debugging, accessing the app’s config file or the phone book xml file which are all stored in this folder. The application log file is also stored in this folder but that can also be accessed via the “Log File” menu item discussed below.
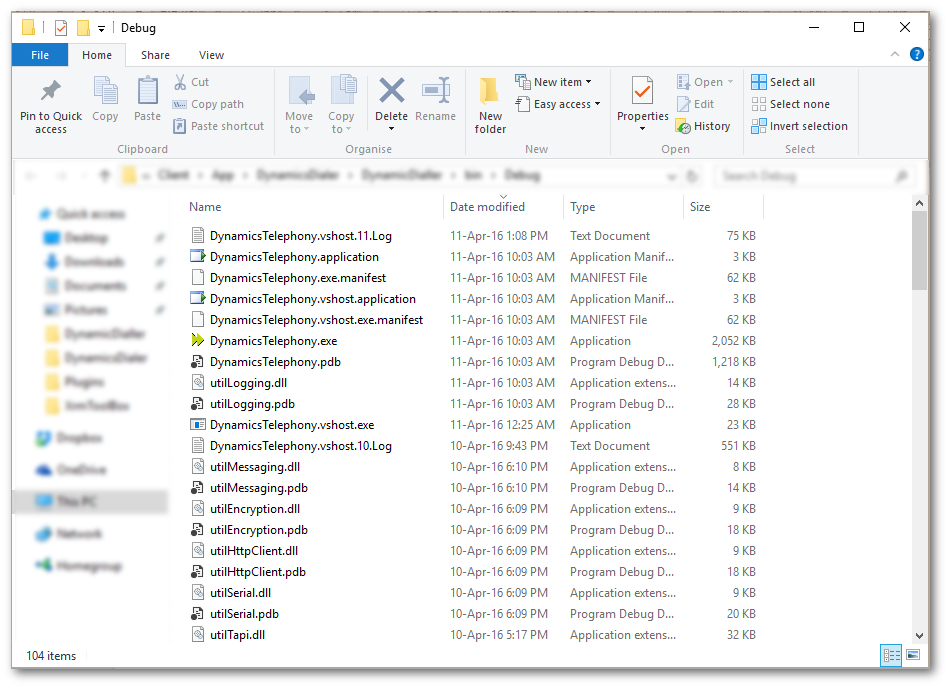
Fig 3.5 - App Folder
3.5 Log File
Sometimes the onsite IT dept. or the DT support team will ask for a log file if an agent is experiencing any difficulties using the app. The Log File menu item will open the current log file using the default text editor. The first time an agent selects this option, they may be prompted to select an application with which to open the file. Agents can use their favourite installed editor or simply select windows Notepad (Fig 3.7) to open this type of file.
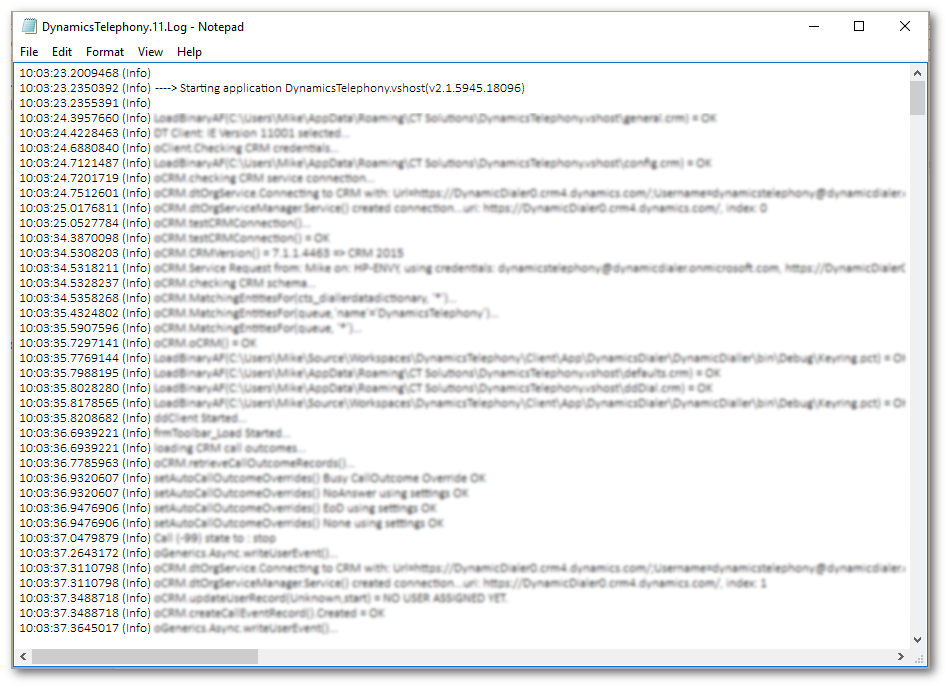
Fig 3.6 - The Log File
Log files are stored using a filename including the day of the month (“DynamicsTelephony.NN.Log” where NN is the day of the month) and as such recycled on a monthly basis. The Log File menu item will only open todays log file. If an older log file is required, use the App Folder menu item described above and select the log file from the day required. Remember the file must be less that last a month old or it will be recycled.
3.6 Report An Issue
Selecting The Report An Issue menu item opens a web page (fig 3.7 below) that describes what is required to report an issue to the Dynamics Telephony support team and the email address to send it to. To report an issue please collect the log file described above, take a screen shot of the issue where possible and send an email to the support team describing the issue and the approximate time of day the issue occurred.
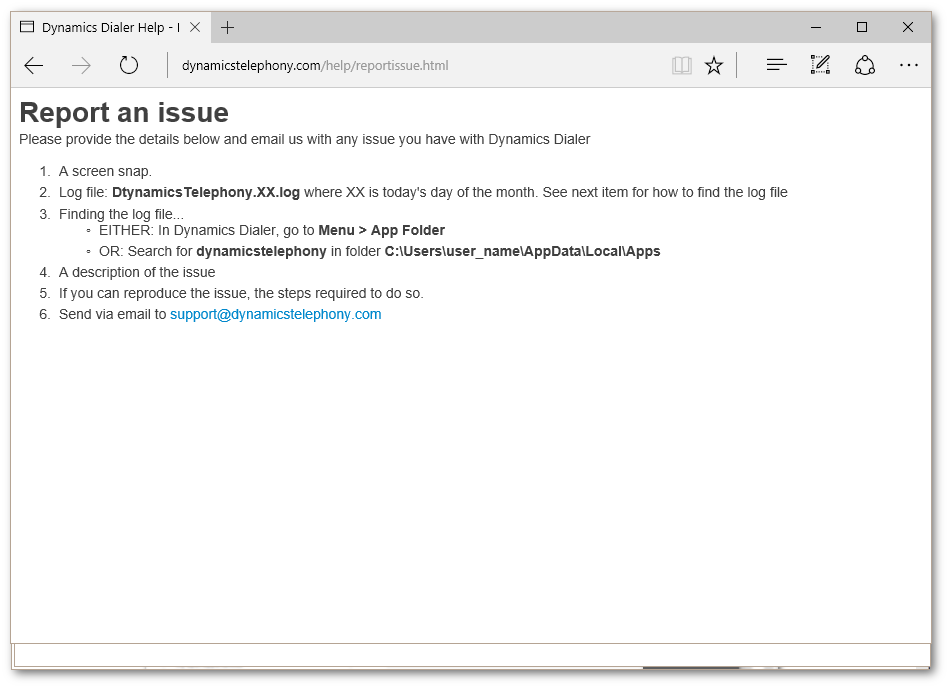
Fig 3.7 - Report An Issue
3.7 Agent Dashboard
The Agent Dashboard menu item launches the Agent Dashboard (Fig 3.8), which is described in the Dynamics Telephony User Guide.

Fig 3.8 - Agent Dashboard.
3.8 CRM Settings
During initial installation, the application will create one entry in the Linked CRM’s table to reflect the default CRM entered during installation. For most customers this will be all that is required. Editing this entry allows call tabs to be decorated using customized colors and a logo so as to be instantly recognizable by users.
Some organizations may want to the application to host several CRM instances (Multi Tenancy). To do so, add these linked CRM’s here, adding color coding and a logo where appropriate to clarify to the agent what CRM they are working on at any given time.
Selecting the option “CRM Settings” from the settings menu will open a window of linked CRM’s (fig 3.9). To edit or delete an existing entry, click on the required item in the list. To add a new entry, click on the “+” button at the bottom of the window.
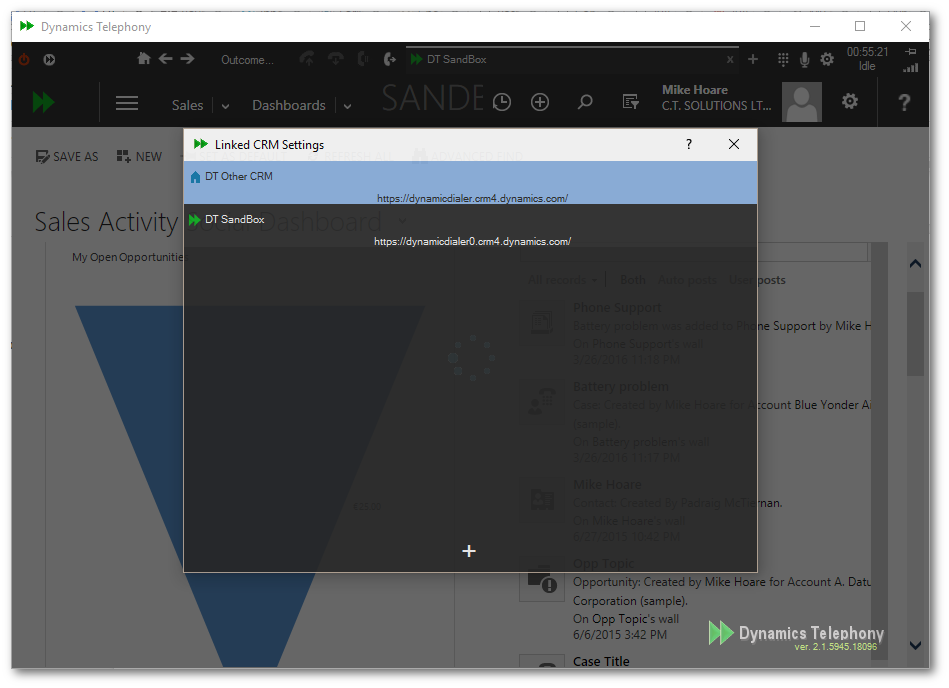
Fig 3.9 - CRM Settings
Having selected an item to edit or clicking the “+” button to add, a new window will open (fig 3.10 - Linked CRM Edit) to allow you to configure the entry. Each Linked CRM item requires the following entries:
- Label - The label entered here will be displayed on the call tab
- Url - The url to be CRM to be used. The credentials entered in section 4.2 will need to be valid for this url as well as the default. EG if the credentials given during initial install are for the use “dynamicstelephony”, this user will need to be configured on the linked CRM as well, with the same rights and password.
- Back Color - This color will be used as the background color for all call tabs using this CRM
- Fore Color - This color will be used as the foreground color for all call tabs using this CRM.
- Logo - (optimum size 64x64, must be in PNG format) will be used as the logo for all call tabs using this CRM.
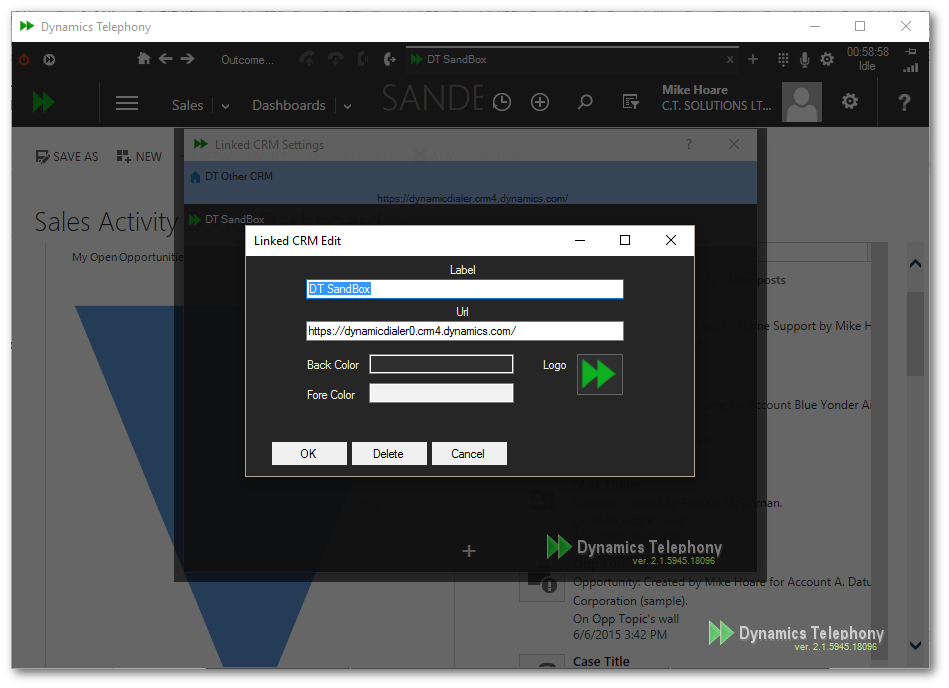
Fig 3.10 - CRM Settings - Edit
Once satisfied with the CRM entries click OK to save. To delete an entry, click the delete button.
The CRM’s listed here will be used in the Queues and DNIS sections below, so it is important that they are setup correctly here first.
3.9 Queue Settings
Dynamics Telephony supports integration with CRM queues to supply outbound calls to agents in a managed, distributed manner. To set up queues to work with DT, you must first configure which queues you want the application to use for these calls. To do this select “Queue Settings” from the settings menu and the “Queue Settings” window (fig 3.11) will appear.
As in the Linked CRM’s section above you can customize these entries in the same manner as above to present the end user with a call tab that is decorated in a manner to reflect the queue item being offered.
Queue Settings will respect the CRM visibility afforded to the logged on user. That is, only queues visible to the user will appear in the list and will be worked on by the user. When setting up the queues it is a good idea that the Administrator has the rights to “see” all required queues.
Once all required queues are setup, individual users will only see the queue they are assigned / shared into on the CRM. For example, an administrator can setup all required queues for the Sales and Service departments, but the sales users will only be able to see the sales queues and as such will only work on sales queues in DT. Same for the service department.
Individual queues can be easily turned on and off easily by clicking on/off button on the top right hand side of a queue item listing. To turn off all queues see section 4.8 - Queue Configuration.
Similar to CRM Settings above, to edit or delete an existing entry, click on the required item in the list. To add a new entry, click on the “+” button at the bottom of the window.
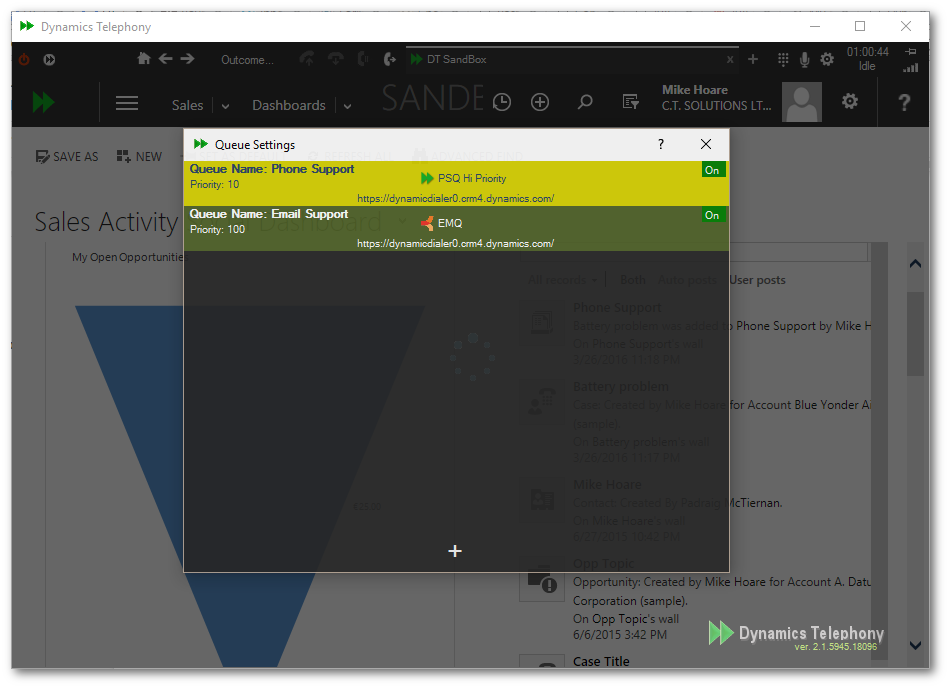
Fig 3.11 - Queue Settings
Having selected an item to edit or clicking the “+” button to add, a new window will open (fig 3.12 - Queue Settings - Edit) to allow you to configure the entry. Each Queue Setting item requires the following entries:
- Url - This dropdown will contain a list of the Linked CRM’s described in the previous section. Select the required CRM from the list.
- Queue - Once you select the Url above, this dropdown will load the queues visible on that CRM for the logged on user. Select the queue required.
- Label - This label will be displayed initially when a queue item is offered to the user. It will be replaced with the To Party details of the queue item after a few seconds.
- Priority (1 - 1000) - The priority settings will determine the order in which queue items are worked on. A Lower number means a higher priority.
- Back Color - This color will be used as the background color for all calls offered from this queue.
- Fore Color - This color will be used as the foreground color for all calls offered from this queue.
- Logo - (Optimum size 64x64, must be in PNG format) will be used as the logo for all calls offered from this queue.
- On / Off - Determines the status of the queue within dynamics telephony.
Once satisfied with the a Queue entry click OK to save. To delete an entry, click the delete button.
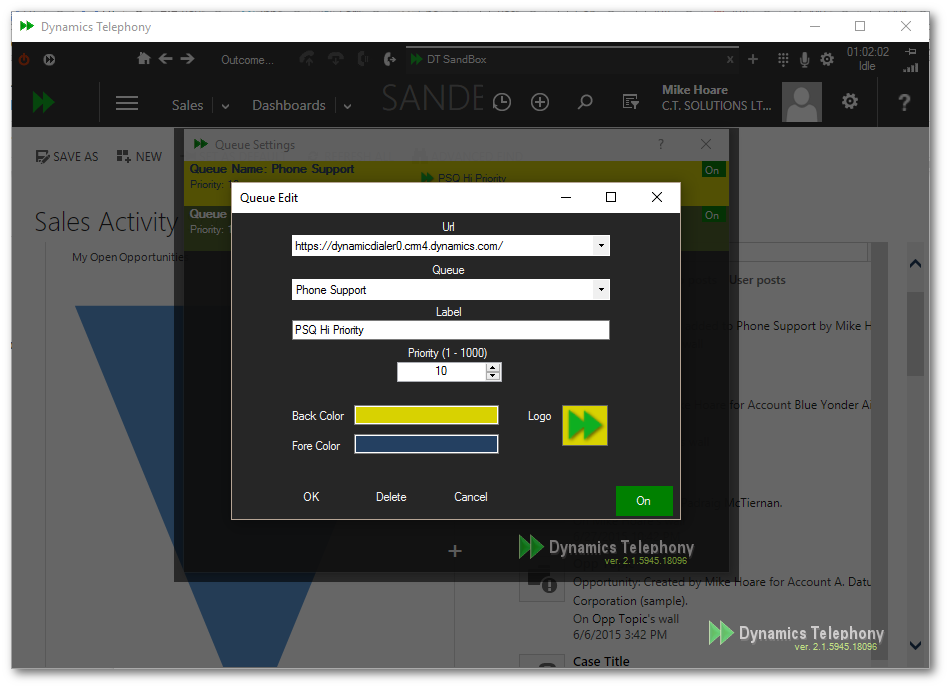
Fig 3.12 - Queue Settings - Edit
3.10 DNIS Settings
The name given to the number dialled by the caller in the telecoms industry is the “Dialled Number Identification Service” or DNIS, which is the term we will be using for the remainder of this section. DNIS allows Dynamics Telephony to customize the display of inbound calls depending on the number dialled by caller.
Dynamics Telephony supervisors / administrators can set up a list of DNIS numbers which are color coded with a logo and a label description similar to the preceding sections. The label text will contain a description to help the agent identify the probable purpose of the call. For example if a marketing campaign placed an advert with a number to dial for more information, this number might be DNIS’d to allow agents to recognize the call is relating to this marketing advert. To set up DNIS numbers select “DNIS Settings” from the settings menu and the “DNIS Settings” window (fig 3.13) will appear. To edit or delete an existing entry, click on the required item in the list. To add a new entry, click on the “+” button at the bottom of the window and the Edit window will appear (fig 3.14).
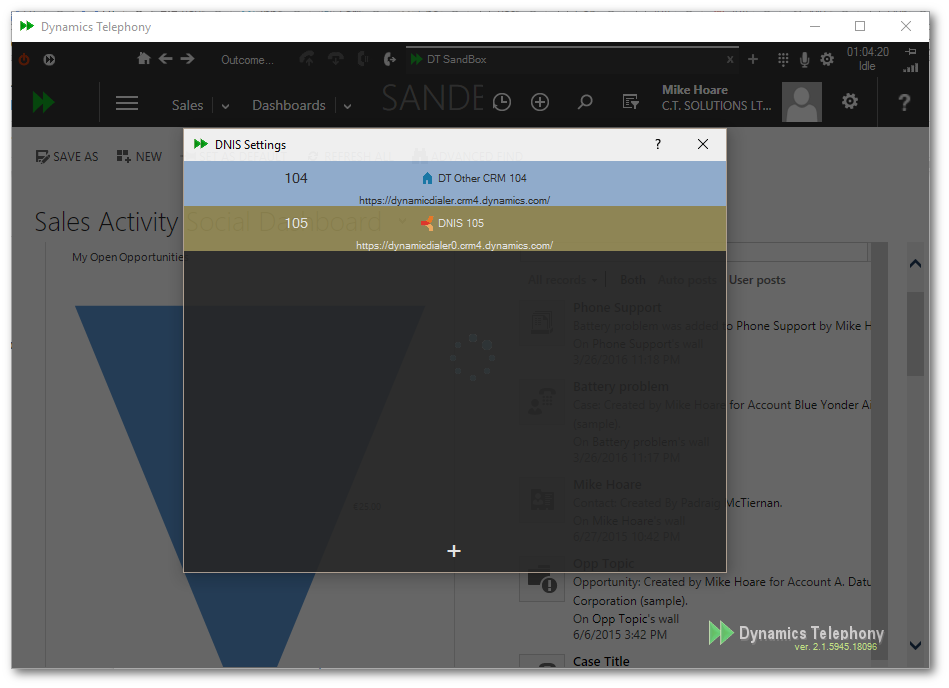
Fig 3.13 - DNIS Settings
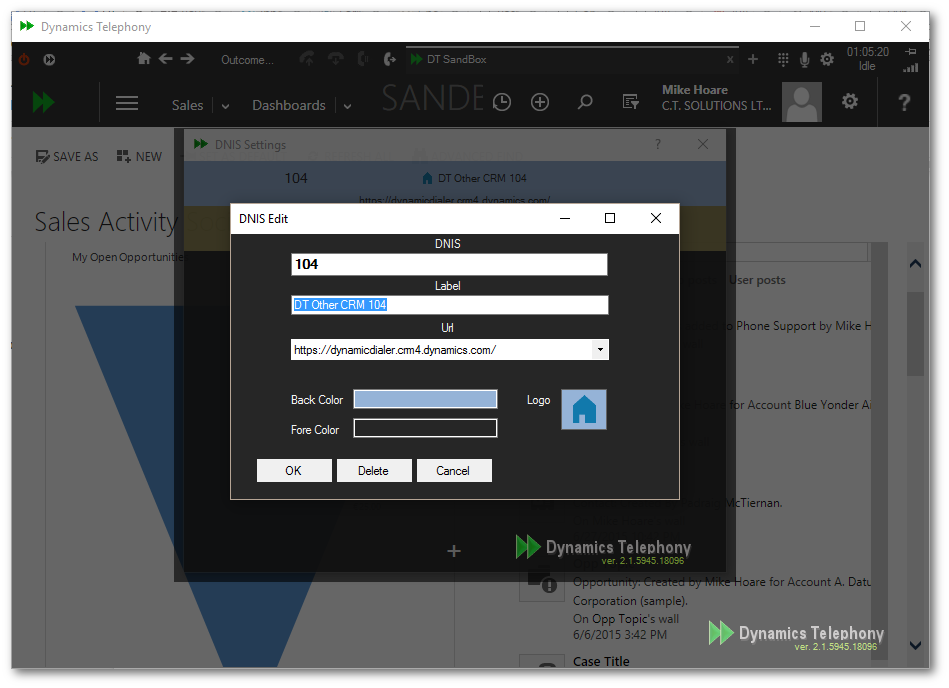
Fig 3.14 - DNIS Settings - Edit
Having selected an item to edit or clicking the “+” button to add, a new window will open (fig 3.14 - DNIS Settings - Edit) to allow you to configure the entry. Each DNIS Setting item requires the following entries:
- DNIS - This is the dialled number to detect from the caller.
- Label - This label will be displayed when a call to this DNIS number is offered to the user. It will be replaced with the To Party details of the call if an incoming match is found or selected by the user.
- Url - This dropdown will contain a list of the Linked CRM’s described in the previous section. Select the required CRM from the list.
- Back Color - This color will be used as the background color for all calls offered for this DNIS number.
- Fore Color - This color will be used as the foreground color for all calls offered for this DNIS number.
- Logo - This (optimum size 64x64, must be in PNG format) will be used as the logo for all calls offered for this DNIS number.
Once satisfied with the a Queue entry click OK to save. To delete an entry, click the delete button.
3.11 Outcome Settings
Dynamics Telephony allows users to set outcomes against calls and will add some default outcomes during installation. Different organizations will require different outcomes for their own use and as such outcomes can be tailored. Dynamics Telephony supervisors / administrators can view the list of installed outcomes, by selecting “Outcome Settings” from the settings menu. A form will open listing all current outcomes in the order they will appear in the outcomes popup window (fig 3.15 - Outcome Settings).
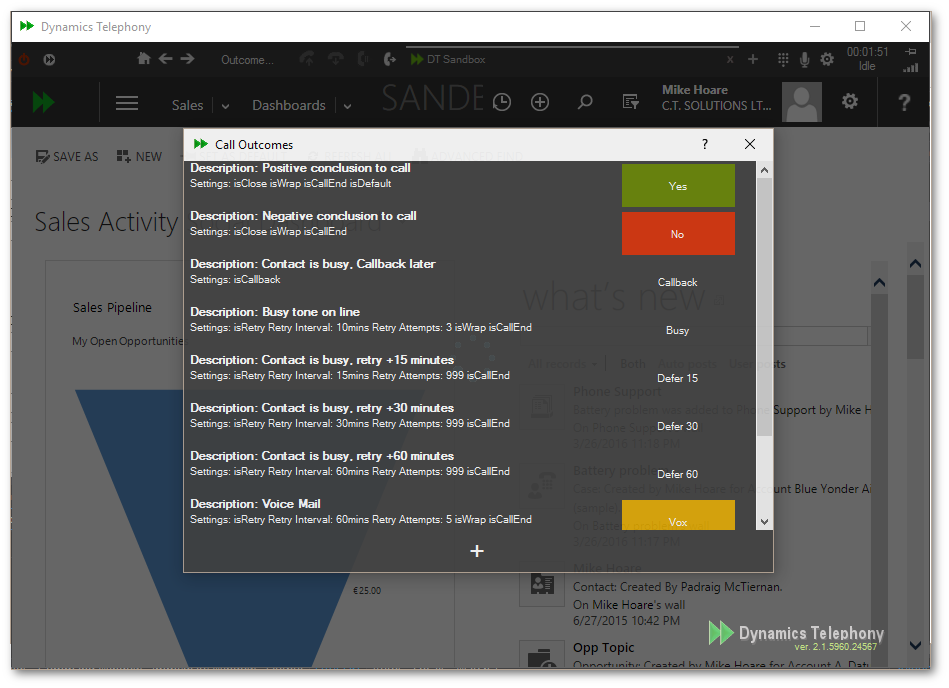
Fig 3.15 - Outcome Settings
To change to order of an outcome simply drag and drop it to the required position. Once dropped, the list will be reordered to reflect the change (fig 3.16 / 3.17).
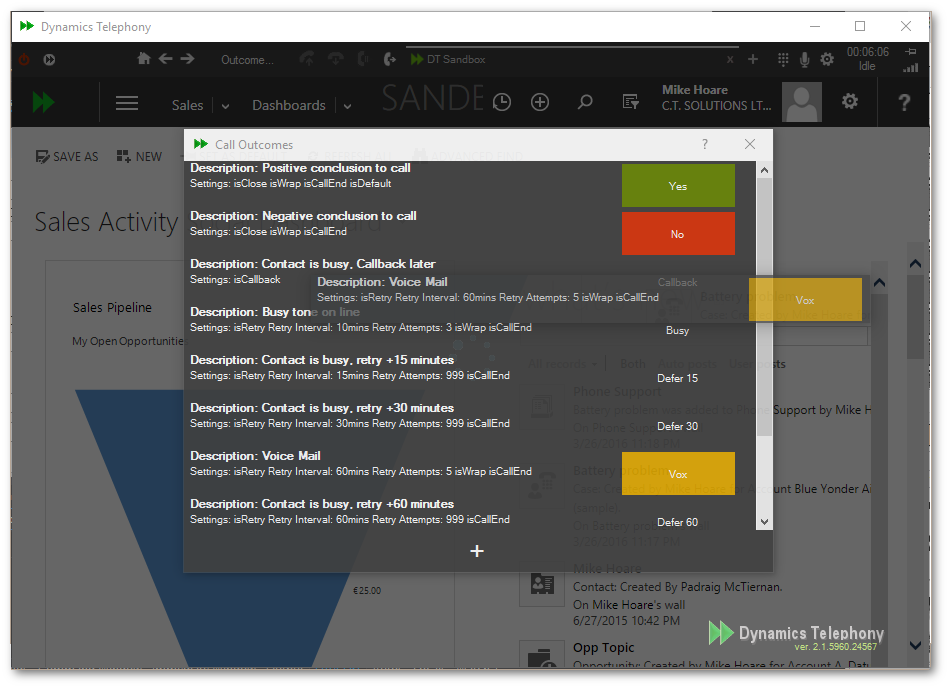
Fig 3.16 - Outcome Settings - Drag
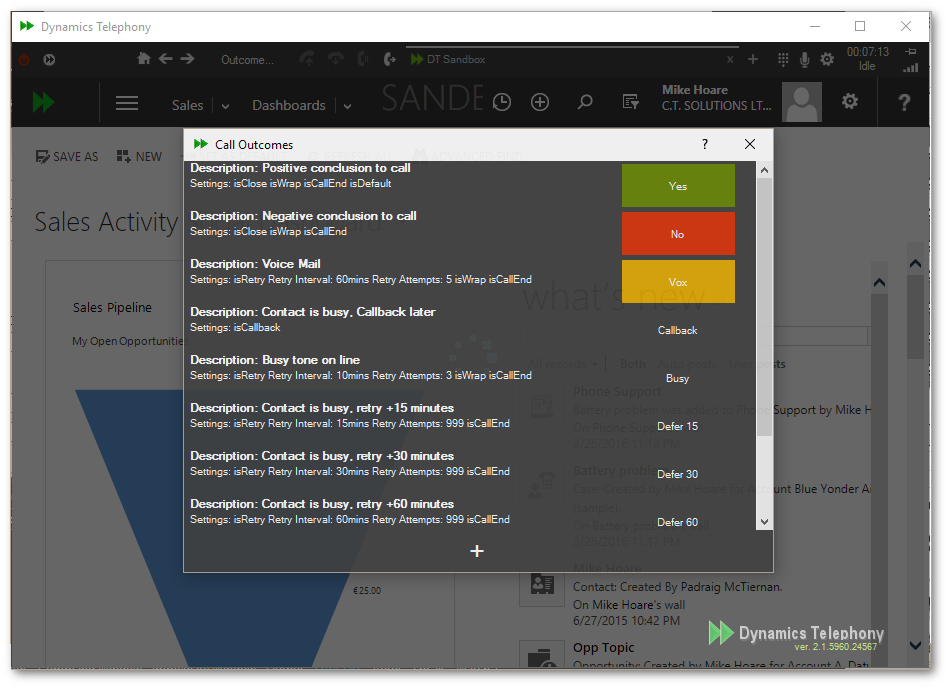
Fig 3.17 - Outcome Settings - Drop
To edit or delete an existing entry, click on the required item in the list. To add a new entry, click on the “+” button at the bottom of the window and the Edit window will appear (fig 3.18).
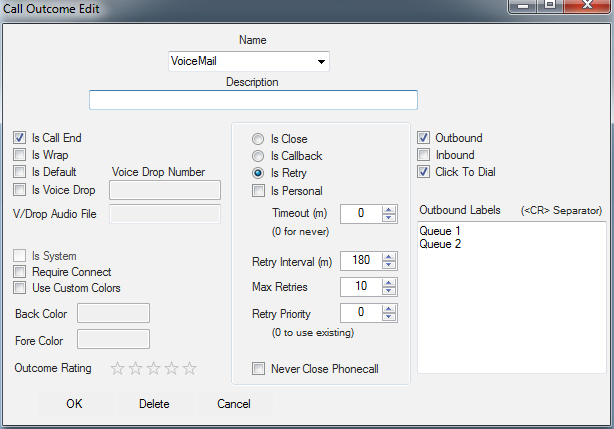
Fig 3.17 - Outcome Settings - Edit
Having selected an item to edit or clicking the “+” button to add, a new window will open (fig 3.14 - Outcome Settings - Edit) to allow you to configure the entry. Each Outcome Setting item has the following properties:
-
Name - The Name that will appear on the outcome popup window. The name will also be stored against the call in the Dynamics Telephony custom entity “DiallerCall”. This name will also be used in the outcomes dashboard.
Instead of typing a name (for a new outcome), you can pick a System Outcome from the list and change its properties. The most likely one to change is noanswer. (NOTE: If you make an outcome named No Answer, it will override noanswer. This is to allow for better display). You may also want to change the System Outcome named Default, to allow some other outcome be the default, as you can only have one default.
- Description - A description for the outcome. This is for reference purposes only.
- Is Call End - If set, clicking this outcome will hang up the call, otherwise the user will have to click the release button manually to end the call.
- Is Wrap - If set, the user will receive wrap time at the end of the call to update any data in the CRM. Otherwise once the call is released, the application will move on to the next available item to dial.
- Is Default - If set, this outcome will be used if the user does not select an outcome for a call. There should only be 1 default outcome. If no default outcome is set, the agent will be prompted to select an outcome for all outbound calls. NOTE there is a system outcome already set as the default. You would need to turn off the system default for your new default to be used. See system outcomes.
- Is VoiceDrop - If set, selecting this outcome will result in the call being transferred to the voicedrop number below, which will play a voice prompt to the other party. Talk to your Dynamics Telephony vendor to find out more information on VoiceDrop.
- VoiceDrop Number - The number used if the outcome has “Is VoiceDrop” set. Search the knowledgebase for more on Voice Drop
- Is Close - If set, the underlying phonecall activity will be marked complete at the end of the call. Otherwise the phonecall activity is left as is.
- Is Callback - When an Callback outcome is clicked, a Calendar and Time window will appear to capture the retry date and time for calling the party back. The retry time is then applied to the phonecall activity and the call can re-present at the retry date and time.
- Is Retry - If set, the outcome will set the activity to retry in “Retry Interval” minutes. If the activity has been retried more than “Max Retries” times, the outcome will proceed to close the outcome as per “8. Is Close” above.
- Retry Interval - see 10. above. The value is minutes. Examples: for 2 hours use 120, for 1 day use 1440, for 2 weeks use 20160. You can use any number up to 32,000,000 which is 60 years!
- Max Retries - see 10. above
- Require Connect - If set, the outcome button will not be clickable until the user is in the TALK state. This is to prevent users applying certain outcomes without talking to the customer.
- Custom Colors - If set, custom colors are used to decorate the outcome button, otherwise the default app colors are used.
- Back Color - The background color to set for an outcome.
- Fore Color - The foreground (text) color to set for an outcome.
- Outcome Rating - This sets the rating, from 1 to 5 for the outcome. The rating is intended to enable gamification. You would apply a higher rating to outcomes that are more beneficial to the business. The rating is logged against the call record in entity dialerCall. So, you can make a report of user performance based on the total of their rating for the day or week.
- Retry Priority - When there are multiple retry queueitems overdue, the priority of the outcome is used to determine the order of selection for popping to a user. You set this outcome priority here - 1 is most important. Value can be up to 32,000,000. 0 means keep the same priority as the previous call. So, you use this when you need to make some retrys more important than others.
- Never Close Phonecall - This will mean Dynamics Telephony will NOT close the phone call it creates when this outcome is clicked. If you have your own workflow or process for closing phonecalls, you might want to use this option.
- Is Personal - This causes a callback or retry phonecall to be reserved for the user that set up the callback or retry. You would only use this on a queue that is a shared queue. Do not use this when using personal queues as the callbacks and retrys there can only be done by the same user anyway. The Timeout option is to allow the callback or retry to pop to any user after the Timeout.
- Outbound | Inbound | Click To Dial - These checkboxes allow you to select the type of call the Outcome button will be available for. "Outbound" refers to Outbound Queues dialer calls.
- Outbound Labels - This setting is used to have a different set of outcome buttons for each queue. The labels are the names of the queues this outcome button is to be displayed for. Queues that are not mentioned in any outcome's labels will display ALL outcome buttons for the user. You can enter multiple labels (queue names) on separate lines, as shown in the snap above. ONCE YOU START USING OUTBOUND LABELS YOU WILL PROBABLY NEED TO APPLY THEM TO ALL OUTCOMES.
Once satisfied with the a Outcome entry click OK to save. To delete an entry, click the delete button.
3.12 Uninstall System
To uninstall Dynamics Telephony, select the “Uninstall System” option from the settings menu. A confirmation warning will appear (fig 3.15). Click yes to continue the uninstall.
For users to have access to this option they must be given access to the menu item as per the settings described in section 4.9 Admin Access and they also must be a member of the CRM Role “Dynamics Telephony Uninstall” which is created during the installation.
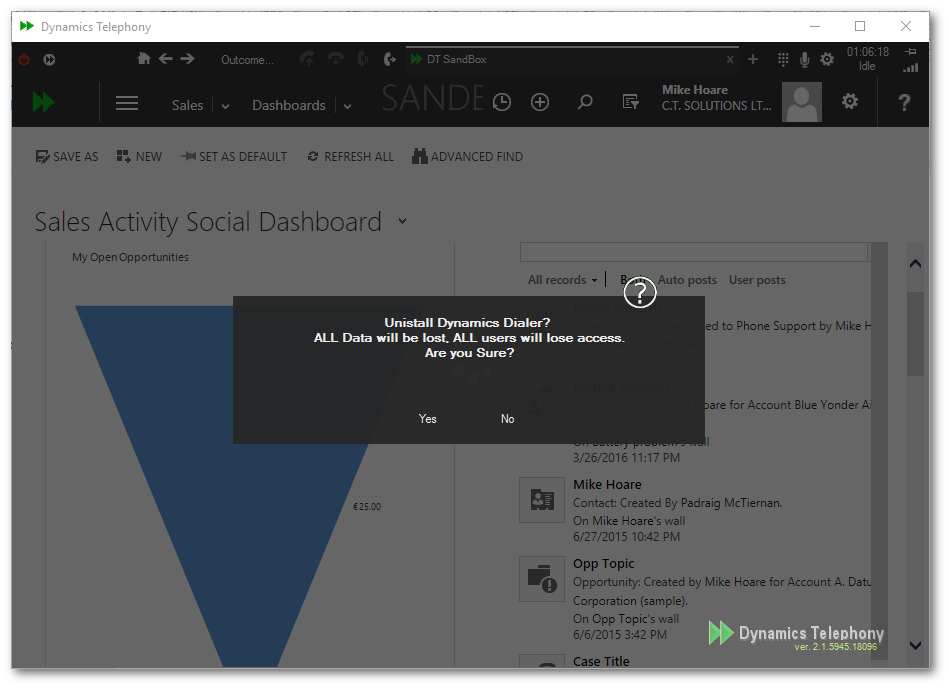
Fig 3.15 - Uninstall System - Confirmation
Once confirmed, the system will begin uninstalling and a progress dialog will appear similar to fig 3.16. Allow the process to continue and when finished the application will terminate. To remove the app itself go to the windows control panel, add / remove programs section and select DynamicsTelephony from the list of installed programs. Right click and select Uninstall from there.

Fig 3.16 - Uninstall System - Uninstalling
3.13 About
The about screen displays the product version number, total licenced users and the expiry date of the current licence. Support teams may ask users to take a screen shot of this window for analysis.
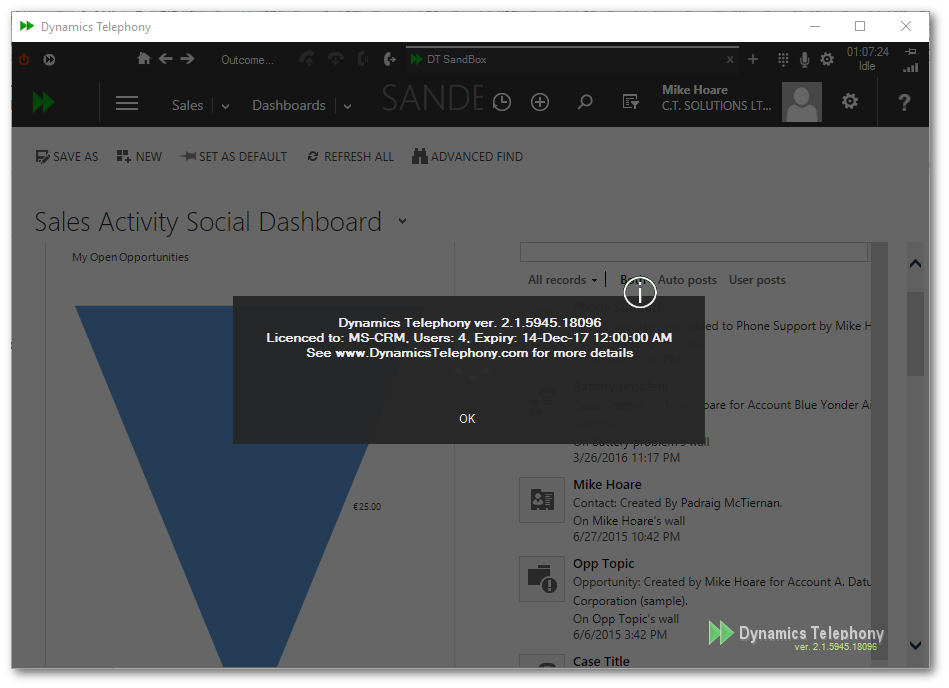
Fig 3.17 - About
Chapter 4 - Dynamics Telephony Settings
After installation, changes to configuration are made through the “Settings” menu item (fig 4.1). There are several configuration tabs on the left hand side of the screen. Below we will go through each on in detail.
4.1 General / Advanced Settings
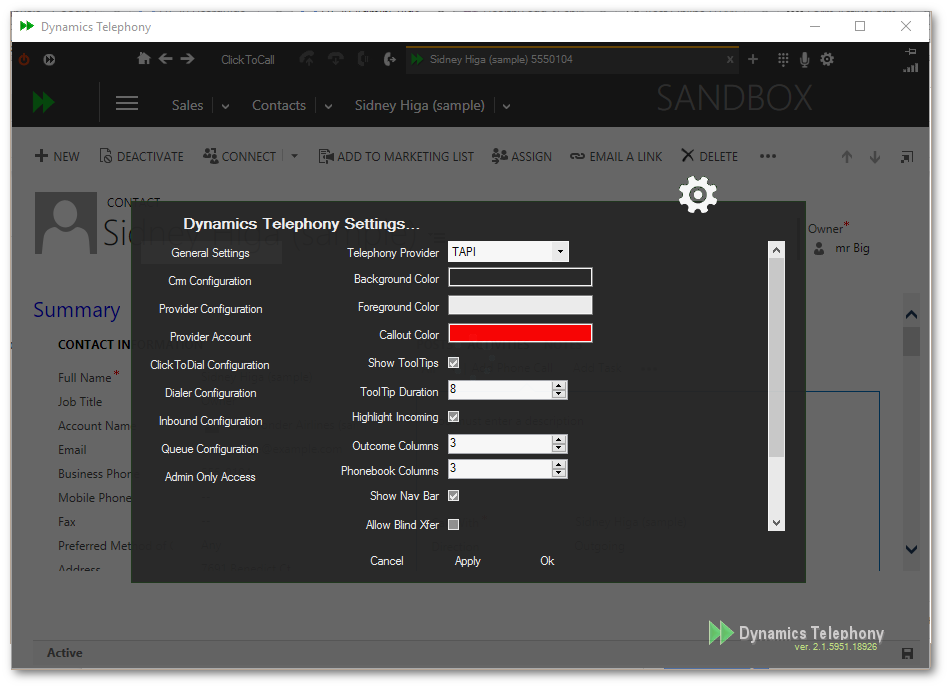
Fig 4.1 - General Settings
The General / Advanced Settings tabs provides the following configuration items.
- Telephony Provider - This dropdown displays a list of currently supported telephony providers. When a telephony provider changes, the “Provider Account” and “Provider Configuration” tabs will also change to reflect the settings relevant for that provider. After selecting the required telephony provider, make sure to configure the provider account (section 4.4) / configuration (section 4.3) tabs afterward.
Dynamics Telephony allows the use of multiple / mixed providers and will save each provider’s setting separately per user. This allows users to quickly change between configured providers (EG1 if a user uses CCT in the office and Skype when working from home, EG2 The New York Office use an Avaya system whilst the Chicago office use Cisco, London office uses Cloud Pbx etc... ).
The current supported telephony providers / protocols are list below (more are being added all the time so please check back for the listed list).
SIP (Voip, Cloud PBX, ShoreTel, RingCentral, Vonage, Nextiva, Jive etc...)
AvayaCCT (Avaya)
CiscoFinesse (Cisco)
SkypeLync (Skype For Business, Lync)
Tapi (Avaya, Cisco, ShoreTel etc…)
Simulator (System testing, Demonstrations)
Asterisk (Adds features to SIP. Requires our Asterisk Integration Server)
- Background Color - This settings will set the background color of the Dynamics Telephony toolbar and all associated popup windows.
- Foreground Color - As above for forecolor.
- Callout Color - As above for the origin indicator for a popup tooltip.
- Show ToolTips - On by default, setting this value to false will result in tooltips not being displayed to the user when hovering over a toolbar item.
- ToolTip Duration - The time in seconds to display a toolbar item.
- Outcome Columns - The number of columns to use when displaying the Call Outcomes popup.
- Phonebook Columns - The number of columns to use when displaying the Phonebook.
- Show Nav Bar - On by default, this settings determines whether the toolbar displays Home, Back and Forward browser navigation buttons.
- Allow Blind Xfer - Off by default, this settings determines whether a user is allow to employ “Blind” or “Cold” transfer of calls as opposed to consult/warm transfers.
- Opacity - This settings determines the opacity of the toolbar.
- IE Version - (obsolete) The setting sets the Internet Explorer Compatibility setting for the application.
- Call Tabs - (obsolete) Sets the maximum number (Default 6) of call tabs used by the application. The user can override this setting by manually adding more tabs.
- Blur State Times - If ON, Wrap and Preview countdowns will pause (blur) if a different Dynamics Telephony window comes in front of the one counting down. If OFF, the timer will continue to countdown when you switch to another Dynamics Telephony Window. Some sites will keep this ON to prevent wrap expiring, or preview expiring unexpectedly for the user. You would need this ON if you allow inbound calls during Preview time. You would turn it OFF for more aggressive time-keeping enforcement on the users. Default ON.
4.2 Crm Configuration
Clicking on the “Crm Configuration” tab brings up the Crm configuration screen which contains the same settings as the screen shown in section 2.3 - Initial Install. Below is a list of available settings with a description of each.
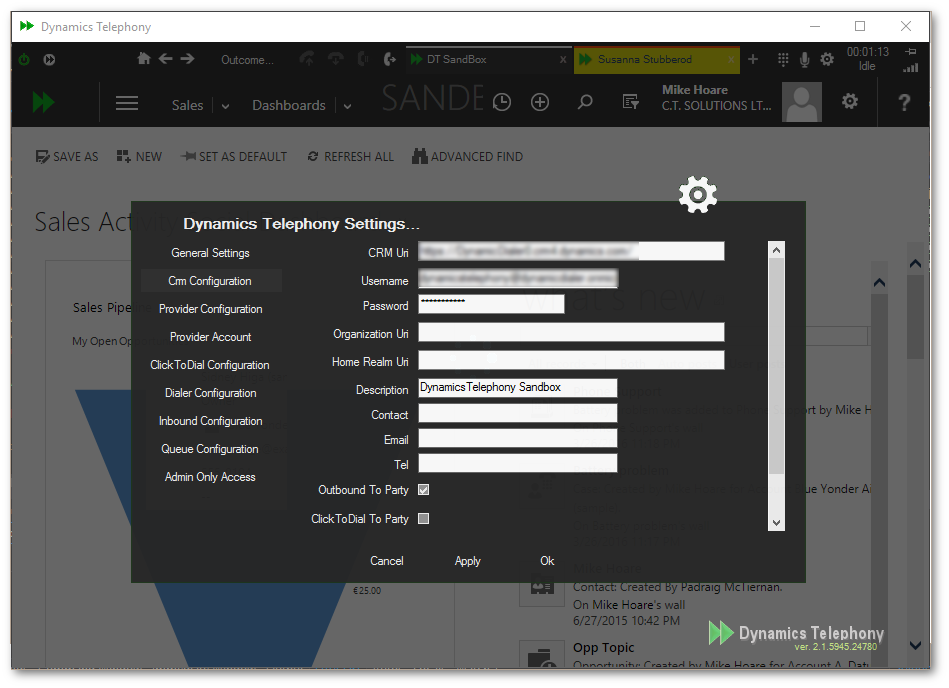
Fig 4.2 - Crm Configuration
- CRM Url - This is the Url of the CRM instance that will be used by the application. Normally the same as what you enter in your browser to load the CRM minus everything after the last forward slash (“/”). Required .
- Username - The username for the account to used used by the application in the background. This account must be a system administrator on the CRM. Required .
- Password - The password to match the account above. Required .
- Organization Url - The Organization Service Url of the CRM. This is used if you want the application to connect to the CRM using the organization service (web services) instead of connecting using the CRM uri which is equivalent to a user logging in. Optional.
- Home Realm Url - The Home Realm Url of the CRM. Again can be used to connect to the CRM using web services instead of via the CRM Url. Optional.
- Description - If entered, the description will be used in place of the CRM Url on call tabs and call notifications. Optional.
- Contact - Support Contact information. Optional.
- Email - Email Contact. Optional.
- Tel - Telephony contact - Optional.
- Outbound To Party - If set, the application will show the To Party of any Phone Call activity when dialling, rather than the Phone Call itself. Optional.
- ClickToDial To Party - If set, the application will navigate to the To Party when a user Clicks To Dial a number, rather than staying on the page and simply dialling the number clicked. Optional.
4.3 Provider Configuration / Account
Provider Configuration and Provider Account are used to configure the telephony connector. Dynamics Telephony supports multiple providers and each one comes with a different set of configuration settings. When you select the Telephony Provider in 4.1 General Settings, the values on these 2 pages change to reflect the provider selected. Below we will go through each one, list each settings and give a brief description.
4.3.1 SIP (Voip, Cloud Pbx, etc..)
The SIP provider is used for all Voip / Cloud Pbx providers and more and therefore can be used to connect to a lot of different telecom companies (For example, if you are using a softphone, you are using SIP). As such there are quite a few settings to configure with the SIP connector. Below is a list of these settings with a description of each.
SIP Provider Account (see fig 4.3.1.1):
- Username - This is the username of the SIP account. This can be a name or some providers use the actual number or extension number as the username. Required .
- Password - The password for the account. Required .
- Display Name - The Display Name will be used on the application notifications and telephony status in place of the username. Optional.
- Host Name - The Provider Url (EG’s sip.ringcentral.com, sip.enhancedvoip.net (Jive), prod.voipdnsservers.com (Nextiva), sip- XXXXX.accounts.vocalocity.com:5060 (vocalocity / vonage) etc…). Required .
- Auth Username - Some providers require an Authorization user that is different from the username. If so enter that username here. Optional.
- Domain Name - Some providers require a specific domain other than the host name, if so enter that ip address / url here otherwise leave this value as ‘*. Optional.
- Proxy Address - Some providers require a proxy for outbound SIP traffic, if so enter that ip address / url here. Optional.
- Transport Mode -SIP traffic is usually transmitted using the UDP protocol. Some companies require using a different protocol. If so select the required protocol from the dropdown list. Optional.
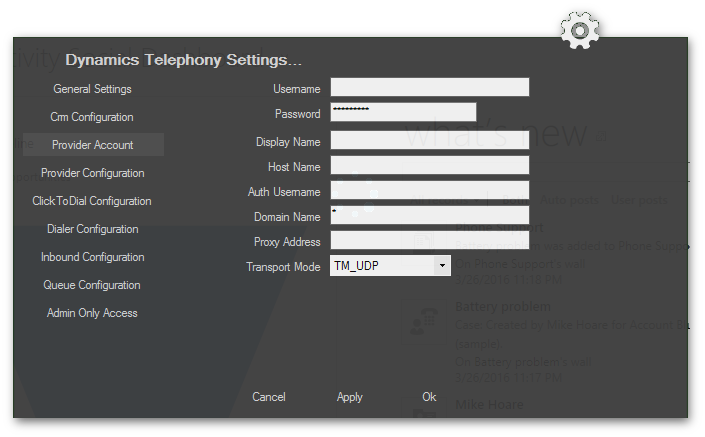
Fig 4.3.1.1 - SIP Provider Account
SIP Provider Configuration (see fig 4.3.1.2):
- SIP Port - The sip port is the port number that all sip traffic will be transmitted over. The default port for SIP is 5060 and this should only be changed if necessary. Required .
- Publish Enabled - PBX supporting presence can enable presence publishing here. If unsure or your PBX does not support presence, please uncheck this option. Optional.
- Stun Server - “STUN (Session Traversal Utilities for NAT) is a standardized set of methods and a network protocol to allow an end host to discover its public IP address if it is located behind a NAT. It is used to pe rmit Network Address Translation (NAT) for applications of real-time voice, video, messaging, and other interactive IP communications.” - Wikipedia. In other words, a stun server helps your SIP / VOIP session translate an external ip address to an internal one. If your provider requires a Stun Server you can enter it here. Optional.
- DTMF Mode - “Dual-tone multi-frequency signaling (DTMF) is an in-band telecommunication signaling system using the voice-frequency band over telephone lines between telephone equipment and other communications devices and switching centers .” - Wikipedia. Basically, DTMF “plays” dial tones to the other party on a connected call. SIP has several formats for doing this, please select the required one from the list. Optional.
- Expires - The expiry time of the SIP registration in seconds. Upon expiration of the registration, the phone will send a fresh re-registration request. If your provider has specified a specific expiry time it can be entered here. Optional.
- Echo Cancel Tail - Echo Cancel Tail length (also known as tail coverage or canceller coverage) is the length of time that the echo canceller stores its approximation of an echo in memory. It is the maximum echo delay that an echo canceller is able to eliminate. Optional.
- VAD Enabled - Voice Activation Detection (VAD) is an algorithm that allows a data network carrying voice traffic over the Internet to detect the absence of audio and conserve bandwidth by preventing the transmission of "silent packets" over the network. Most conversations include about 50% silence. VAD (also called "silence suppression") can be enabled to monitor signals for voice activity so that when silence is detected for a specified amount of time, the application informs the Packet Voice Protocol and prevents the encoder output from being transported across the network. Optional.
- DNS SVR - A Service record (SRV record) is a specification of data in the Domain Name System (DNS) defining the location, i.e. the hostname and port number , of servers for specified services. This is an advanced setting, and should only be used by qualified personnel. Optional.
- Use Dial Prefix - Enable to use a dial prefix for outbound calls. Optional.
- External Dial Prefix - The prefix to dial for outbound calls. Optional.
- Internal Ext. Length - The typical length of an internal extension number (usually 3 or 4 digits). This setting allows the application to differentiate between internal and external calls. Optional.
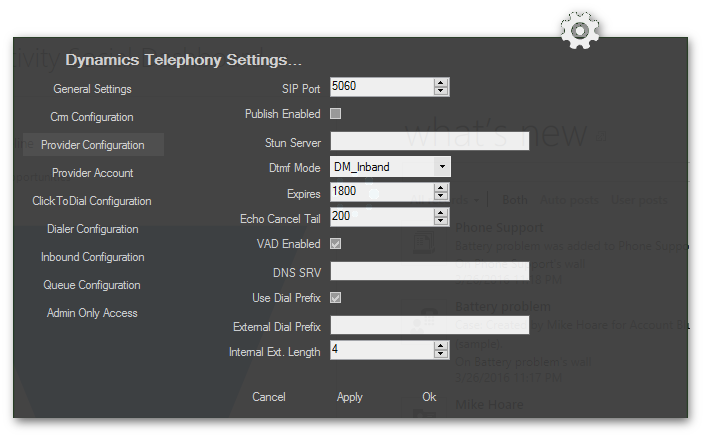
Fig 4.3.1.2 - SIP Provider Configuration
4.3.2 Avaya CCT
The Avaya Communication Control Toolkit (CCT) provider is used for Avaya Aura Call Centers. Below is a list of the settings available for CCT with a description of each.
CCT Provider Account (see fig 4.3.2.1):
- Domain - The domain of the user below. Optional.
- Username - The username to user to login to Avaya CCT. If left blank, the application will use the current logged in windows user which facilitates Single Sign On (SSO) and can reduce the time users spend entering credentials. Optional.
- Password - The password for the username above, only needed if the username is not left blank. Optional.
- Machine Name - The PC name used to connect to Avaya CCT. Optional.
- Agent Id - The agent id number agents use to login at the phone. Required .
- Agent Password (Pin) - The pin number agents use to login at the phone,. This number is often the same as the Agent Id. Required .
- Auto Login - Option to automatically login when the application starts. Optional.
- Auto Ready - Option to automatically make the agent ready when the application starts. Optional.
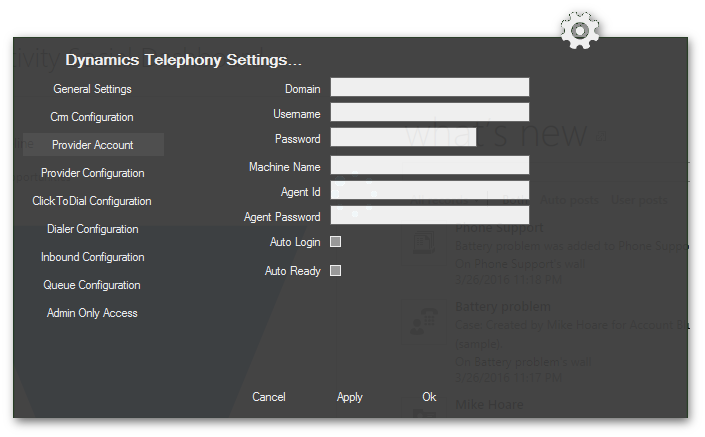
Fig 4.3.2.1 - Avaya CCT Provider Account.
CCT Provider Configuration (see fig 4.3.2.2):
- CCT Server - The Avaya CCT Server Name or IP Address. Required .
- CCT Port - The Port number to connect to on the CCT Server above. Optional.
- Use Dial Prefix - Enable to use a dial prefix for outbound calls. Optional.
- External Dial Prefix - The prefix to dial for outbound calls. Optional.
- Internal Ext. Length - The typical length of an internal extension number (usually 3 or 4 digits). This setting allows the application to differentiate between internal and external calls. Optional.
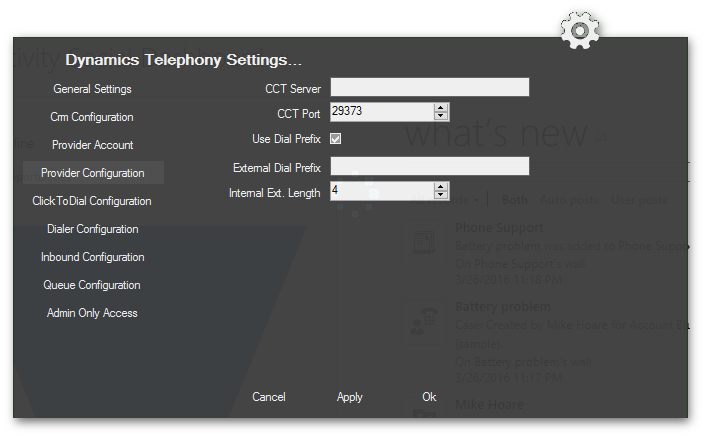
Fig 4.3.2.1 - CCT Provider Configuration.
4.3.3 Skype / Lync
The Skype for Business / Lync connector uses microsoft api’s to interface with the Skype or Lync client which must be installed and configured prior to using the Dynamics Telephony Skype / Lync connector. Since the client is already configured the optional settings below are all that is needed to configure this connector.
Skype / Lync Provider Configuration (see fig 4.3.3.1):
- Use Dial Prefix - Enable to use a dial prefix for outbound calls. Optional.
- External Dial Prefix - The prefix to dial for outbound calls. Optional.
- Internal Ext. Length - The typical length of an internal extension number (usually 3 or 4 digits). This setting allows the application to differentiate between internal and external calls. Optional.
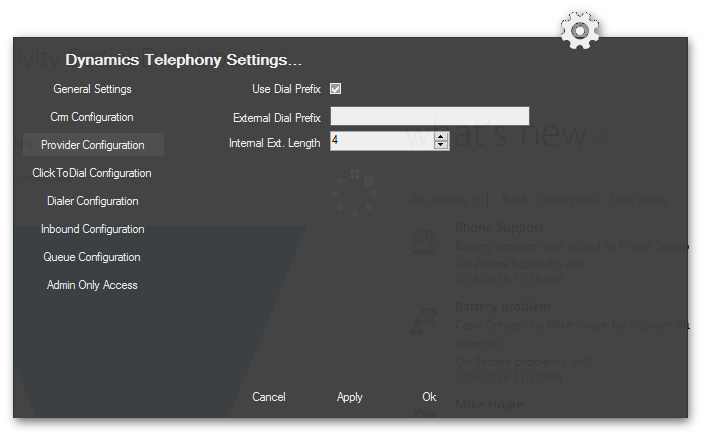
Fig 4.3.3.1 - Skype / Lync Provider Configuration.
4.3.4 Tapi (Avaya, Cisco, ShoreTel Etc…)
The Tapi connector will connect to your Phone system’s tapi service provider (TSP). The TSP should be installed and configured prior to using this connector. TSP configuration varies depending on the Phone System used. If you are not familiar with this software please ask your IT Department or your telephony vendor to assist with this installation.
To make sure the tapi is installed and properly configured we recommend that you download the free Julmar Soft Phone and test using that application, at the very least for the first client using the Tapi connector. Julmars Phone app may be downloaded here .
http://julmar.com/samples/tapi/tapi_soft_phone.zip
Once installed use the Julmar Phone app to acquire the extension required and check that the app can make and receive calls. Once this test is completed successfully you should be able to use the Tapi connector as configured below.
Once the TSP is installed and configured you may configure the Tapi Connector as shown below:
Tapi Provider Account (see fig 4.3.4.1):
- DN (Directory Number or Phone Number) - This is the phone number to use for the connector. Usually this will be the user’s extension. Usually you can leave this blank if the user has only one extension controlled by TAPI. Required .
- Tapi Version - This determines the version of Tapi used by the connector. Valid entries are 2.0, 2.1, 3.0 and the default 3.1. Optional. 2.1 is the most common value used by most TAPI providers..
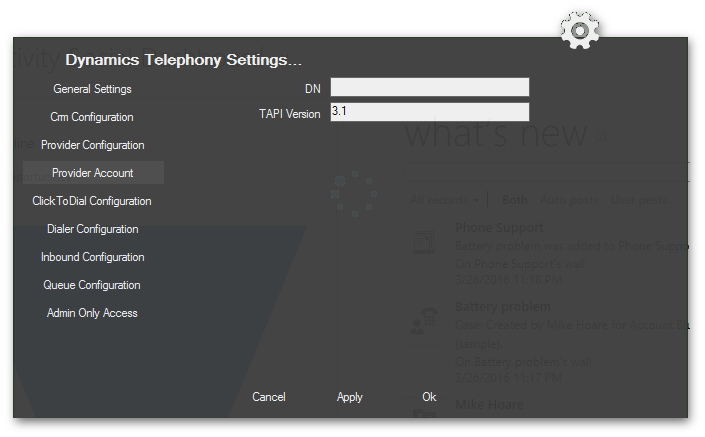
Fig 4.3.4.1 - Tapi Provider Account.
Tapi Provider Configuration (see fig 4.3.4.2):
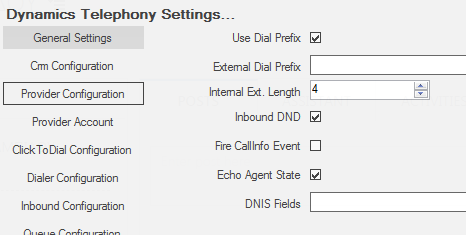
Fig 4.3.4.2 - Tapi Provider Configuration.
- Use Dial Prefix - Enable to use a dial prefix for outbound calls. Optional.
- External Dial Prefix - The prefix to dial for outbound calls. Optional.
- Internal Ext. Length - The typical length of an internal extension number (usually 3 or 4 digits). This setting allows the application to differentiate between internal and external calls. In particular, the transfer feature will not transfer the CRM screen if this setting is not correct. If your numbering plan allows, for example, 3 and 4 digit internal extensions, then enter 4 here. Optional.
- Inbound DND - .
- Fire CallInfo Event - .
- Echo Agent State - .
- DNIS Fields - Normally the DNIS is read from the CalledId field in the incoming TAPI message. Leave this setting blank to keep that mode of operation. Sometimes, you need to use some other field in the TAPI message to retrieve the DNIS. You can set this here. For example, to use the Call Data field, you might use CallData as the setting. Check the Dynamics Telephony log file to find the fieldname that has the DNIS. Note, this setting is case sensitive. You can also provide a list of fields and Dynamics Telephony will use the first non-blank one as the DNIS. E.g. CallData,CalledId
4.3.5 Simulator
Dynamics Telephony provides a simulator connector to ease testing and demonstrations. Use this connector when you don’t want or need to connect to your own phone system but was to use dynamics telephony.
Simulator Provider Configuration (see fig 4.3.5.1):
- Use Dial Prefix - Enable to use a dial prefix for outbound calls. Optional.
- External Dial Prefix - The prefix to dial for outbound calls. Optional.
- Internal Ext. Length - The typical length of an internal extension number (usually 3 or 4 digits). This setting allows the application to differentiate between internal and external calls. Optional.
Fig 4.3.5.1 - Simulator Provider Configuration.
4.4 Click To Dial Configuration
Dynamics Telephony allows the use of its own click handler for earlier version of CRM (2011 Rollup 12 or less) to facilitate Click To Dial on these instances. It is advised to only use this feature when using CRM 2011 RU12 or less as the default CRM click handler is inherent to the CRM when available. Below is a list of available settings with a description of each (fig .4.4.1).
- Click Handler - this dropdown allows the following values CRM, DT or BOTH. Use the default unless the CRM is 2011 RU12 or less. Otherwise use DT.
- Max Phone Length - Use this value to limit the size of a phone number using the DT click handler.
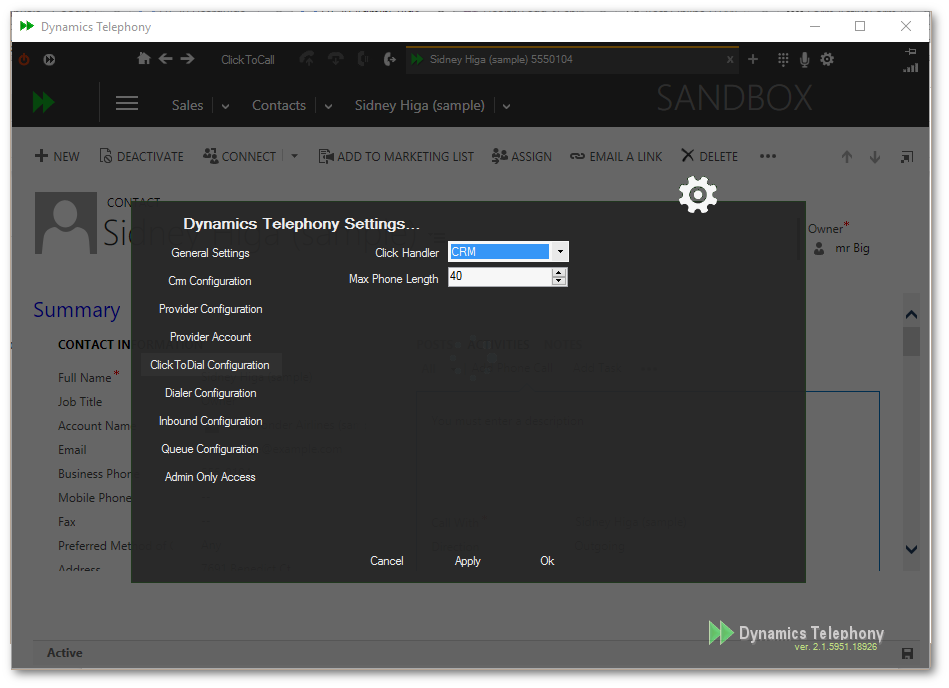
Fig 4.4.1 - Click To Dial Configuration.
4.5 Dialer Configuration
Dynamics Telephony will use the dialer configuration settings for timing outbound calls. Outbound calls include Auto Dialler, DT Queue and Contact Center Integration Calls. Below is a list of available settings with a description of each (fig .4.5.1).
- Preview Time (s) - Preview time is the time in seconds from when a call is Started or Accepted until the call is dialled. This time is intended to give the user a chance to familiarize themselves with the purpose of the call they are about to make.
- Wrap Time (s) - Wrap time is the time in seconds after a call has terminated until the agent is made available for another call. This is intended to allow the user time to update any data before continuing.
- No Answer Time (s) - This is the time in seconds that the application will allow an outbound call to ring before cancelling the call and applying a “No Answer” outcome against it.
- No Answer Retry (m) - The time in minutes to wait before retrying a call that has had an no answer outcome.
- Max No Answers - The number of times to retry a no answer outcome before giving up.
- Busy Retry (m) - The time in minutes to wait before retrying a call that has detected a busy signal.
- Max Busies - The number of times to retry a busy outcome before giving up.
- RegEx Phone Number - Apply a regular expression to an outbound phone number to format the number to a dialable format. Only those with knowledge of Regular Expression should use this option.
- Local Area Code - The area code where the applications configured telephone number is located.
- Country Code - The ISO 2 character country code where the configured telephone number is located.
- Google Phone Library - Determines whether out not the open source Google Phone Library is used to format outbound phone calls before dialling.
- GPL Format - Use the Google Phone Library to attempt to format outbound numbers to one of the following formats: E164, International, National or RFC3966.
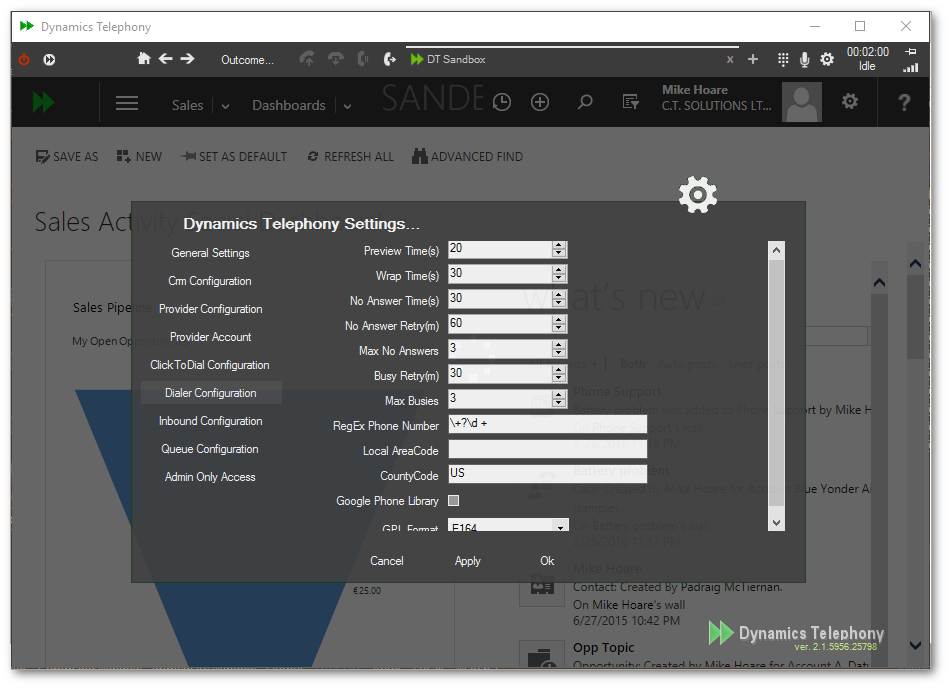
Fig 4.5.1 - Dialer Configuration.
4.6 Inbound Configuration
Dynamics Telephony will use the inbound configuration settings to determine behaviour on inbound calls. Below is a list of available settings with a description of each (fig .4.6.1).
- Answer On Line Select - If set, click on an incoming call’s tab will answer the call automatically. Otherwise the user will have to answer the call using the answer button on the toolbar.
- Restore If Minimized - If set, the app will restore from minimized state when an incoming call arrives.
- Inbound Wrap Time - The settings is for a future development and is not currently used.
- Display PhoneCall - If set, the phone call activity will be displayed ahead of any matching To Party entity for the incoming call.
- Search Active Only - If set, the app will only search for active records to match an incoming call. Otherwise it will search for all records, including inactive.
- Lookup Entities - The is a comma separated list of entity logical names to use when looking for a match for an incoming call. Care should be taken to ensure these are valid entity logical names. Custom entities can also be used.
- On No Match Create - The entity logical name of an entity to create when no match is found looking up an incoming call. The app will create a blank entity and display it for the user.
- RegEx Phone Number - Apply a regular expression to an inbound phone number to format the number to a desirable format for lookup. Only those with knowledge of Regular Expression should use this option.
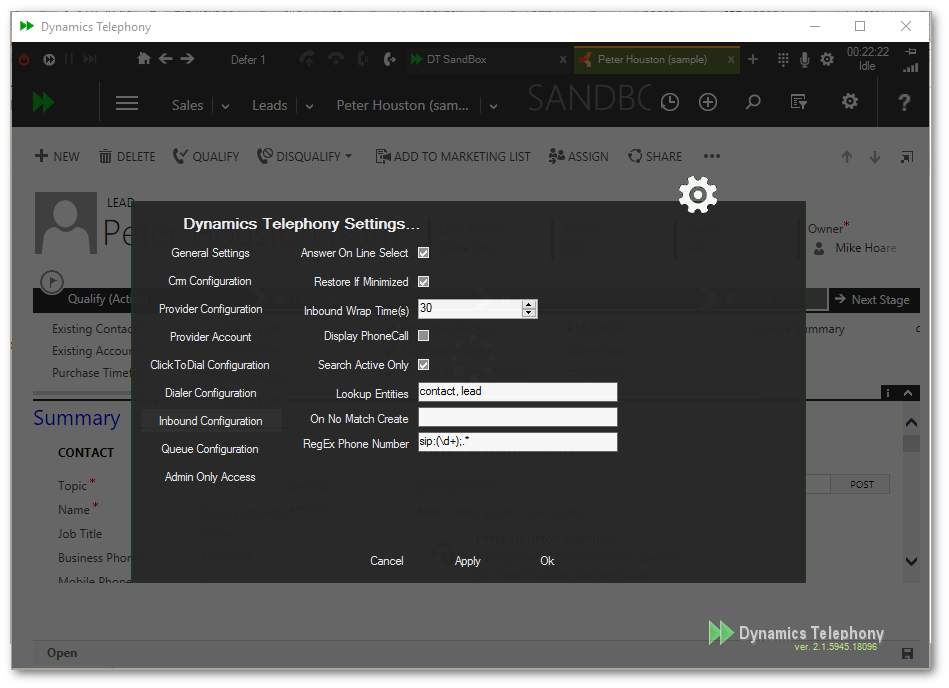
Fig 4.6.1 - Inbound Configuration.
4.7 Queue Configuration
These are GLOBAL settings. Dynamics Telephony can integrate with CRM queues to deliver calls to users. Use Queue configuration settings to turn this feature on and determine behaviour. Below is a list of available settings with a description of each (fig .4.7.1).
- Use Queues - To use queues, this option must be turned on (checked). Individual queues should be set up in “Queue Settings” (see section 3.9) but if this setting is off, no queue items will be presented to users.
- Auto Accept - If set, Offered call will be automatically accepted by the application. Typically used in high volume call centers. When off (default), the user must accept an offered call before it is dialed. If the call is rejected the user is put in a "not ready" state and will not receive further calls until put "Ready".
- Offer Timeout - This is the length of time in seconds that the app will offer a call to a user, before rejecting the offer and putting the application in a not ready state. For example if an agent needs to leave the room for a few minutes and forgot to set a not ready state, an offering call would “bounce” after this number of seconds and the user will be automatically put in a not ready state. The returning user can then make the app ready and will start receiving queue items again. The default value (0) means no timeout.
- Entered On Sort Asc - Generally, items are picked from queues orderd by "Time Entered Queue". This setting controls whether this order Ascending (oldest first), or descending (newest first). For example, some organisations like to get to the newest lead first as it might have the best chance of conversion. they would un-check this setting.
- Respect Phonecall Due Date - If checked (default), Dynamics Telephony will only consider phonecalls where the Due Date is empty or overdue, for selection as the next call for a user. This is useful if you are setting Due Date on phonecalls as you load them for the first time. This only applies to the first phonecall. This does not apply to callbacks and retry's as their "retry time" is managed separately. If this setting is unchecked (off), then all items in the queue will be considered for selection each time.
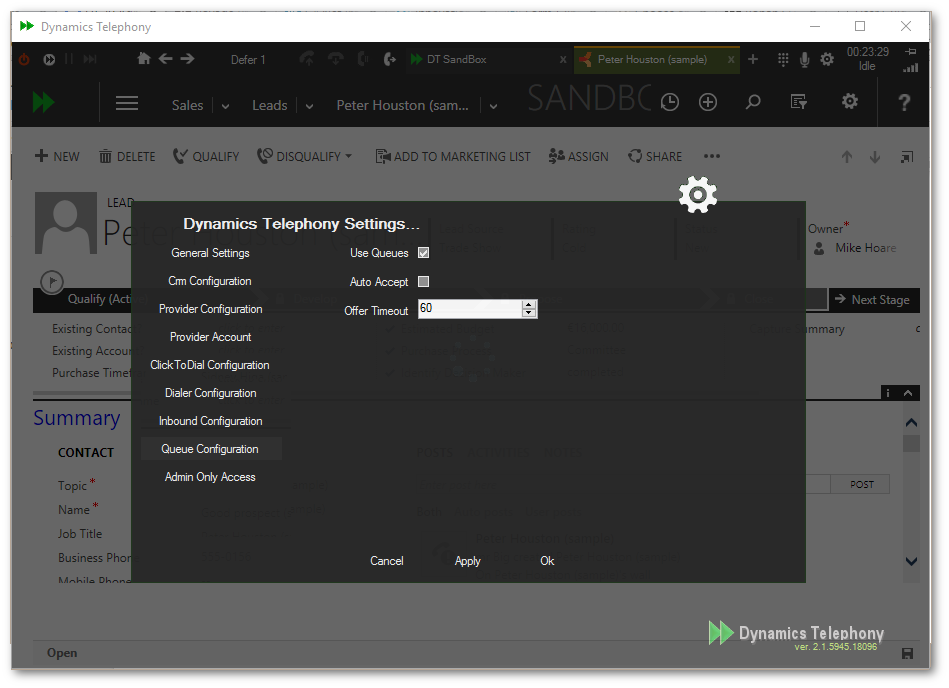
Fig 4.7.1 - Queue Configuration.
4.8 Admin Access
Dynamics Telephony allows admin users to control access to all settings menu options. Use Admin Access configuration settings to determine which options are visible to non admin users. These are all on or off settings. If checked an item on will require admin access. Dynamics Telephony Admin users must be a member of the “ Dynamics Telephony Admin ” role which is created when the app is installed. Otherwise all user will have access. Below is a list of available settings with a description of each (fig .4.8.1).
- Settings - Settings Configuration. Access to sections within Settings Configuration can be set below.
- Phone Book - Access to the phone book described in section 3.3.
- App Folder - Access to the App Folder - section 3.4
- Log File - Access to the App’s Log File - section 3.5
- Agent Dashboard - Access to the Agent Dashboard - section 3.7
- Crm Settings - Access to Crm Settings - section 3.8
- Queue Settings - Access to Queue Settings - section 3.9
- Dnis Settings - Access to Dnis Settings - section 3.10
- General Settings - Access to the General Settings Tab under the Settings Window - section 4.1
- Crm Configuration - Access to the Crm Configuration Tab under the Settings Window - section 4.2
- Provider Account - Access to the Provider Account Tab under the Settings Window - section 4.3
- Provider Configuration - Access to the Provider Configuration Tab under the Settings Window - section 4.3
- ClickToDial Configuration - Access to the ClickToDial Configuration Tab under the Settings Window - section 4.4
- Dialer Configuration - Access to the Dialer Configuration Tab under the Settings Window - section 4.5
- Inbound Configuration - Access to the Inbound Configuration Tab under the Settings Window - section 4.6
- Queue Configuration - Access to the Queue Configuration Tab under the Settings Window - section 4.7
- Admin Only Access - Access to the Admin Only Access (This) Tab under the Settings Window - section 4.8
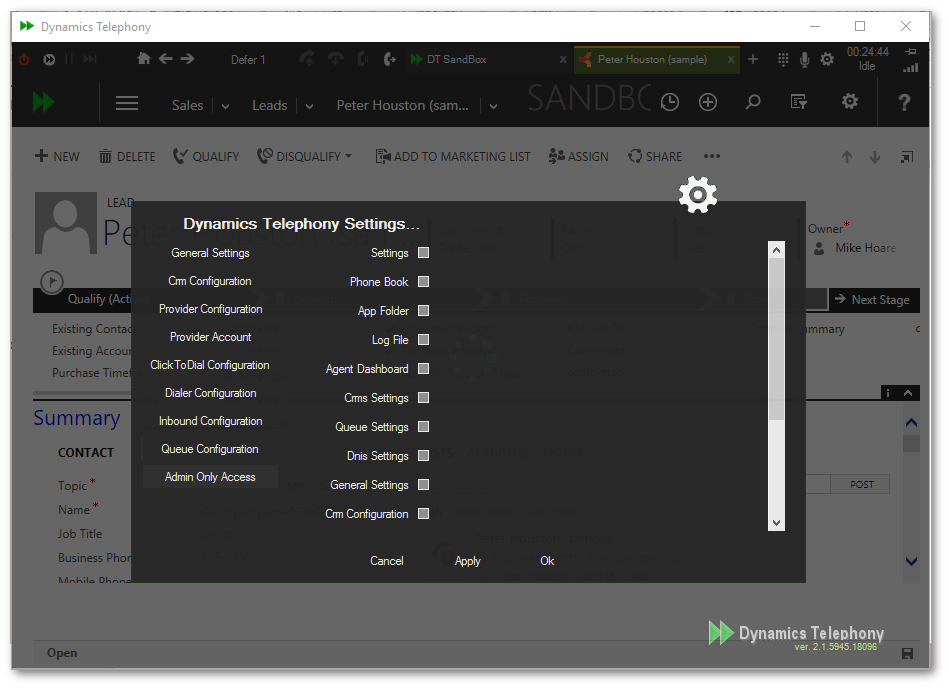
Fig 4.8.1 - Admin Access.